![Knowledge Centerx2-1.png]](https://knowledge.buzzbid.com/hs-fs/hubfs/Knowledge%20Centerx2-1.png?height=50&name=Knowledge%20Centerx2-1.png)
Quick Instructions
-
Download and install the SQL Server.
-
Download and install the SQL Server Management Studio.
-
Set up the Admin machine to receive connections.
-
Make an exception in Windows Firewall.
Detailed Instructions
We highly discourage using SQL Express in a live environment due to its very limited performance. Instead, use SQL Standard or Enterprise versions 2019 and onward. Versions before 2019 are unsupported.
When downloading the installation packages mentioned in this article, make sure you download them from trusted sources!
Also, please check the end of this article for setting up how BuzzBID updates in the Multi-User environment!
Finally, please bear in mind that BuzzBID doesn't create SQL Server accounts - only databases! If you want to minimize the login permissions, two SQL Server logins are needed at least. You need an admin SQL login to update the database, so you should run the app with the admin user first. You can also create regular user SQL login details to read/write data after the database schema is updated or created.
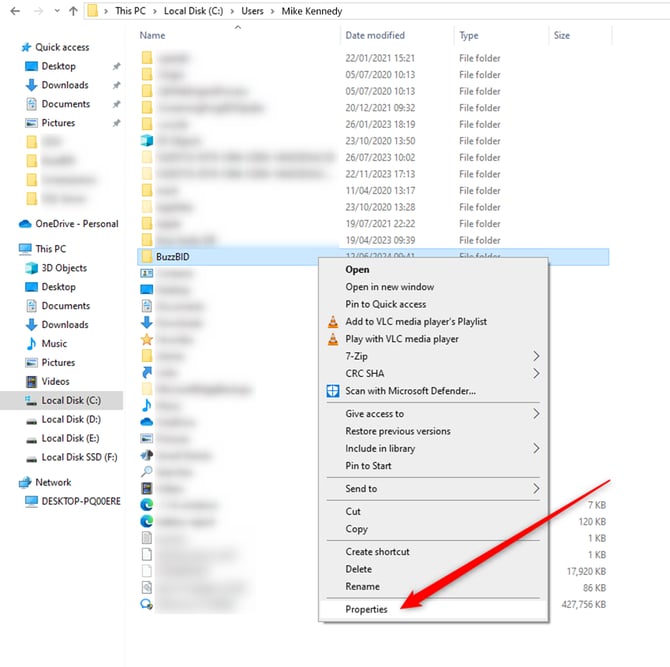
Before you set up the SQL Server, you first need to set up sharing permissions and a sharing folder on the local network. To do this > find where the BuzzBID application is installed (the standard path is C:/Users/[Username]/BuzzBID) and you can share that folder.
Right-click the folder > click Properties.
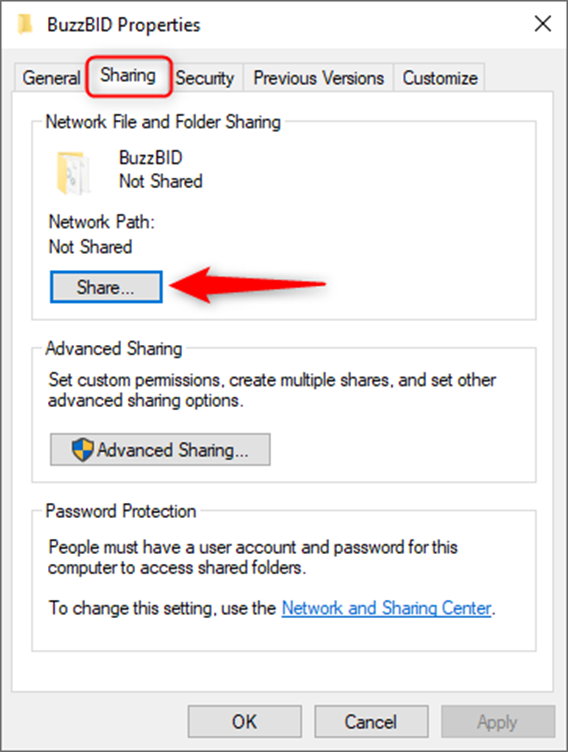
Switch to the Sharing tab > click Share.
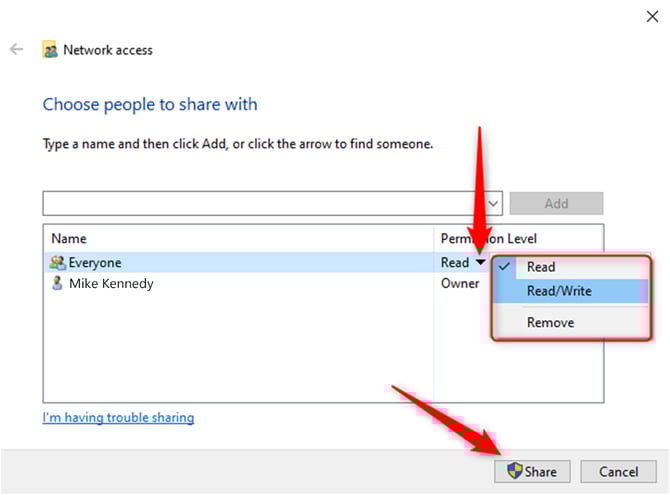
Choose who can access this folder via the drop-down menu. If it is the Local Area Network (LAN), and you trust all connected PCs and users, you can use Everyone. After you select who you want to share the folder with > click Add.
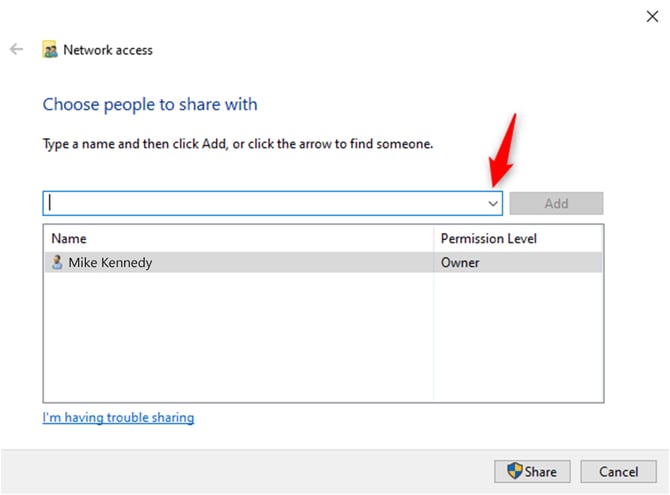
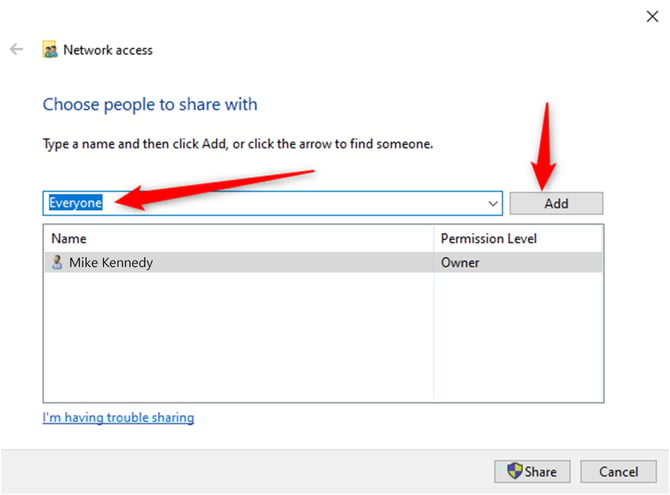
You can choose whether you want the folder to be read-only, or others can edit it. Once you decide, click Share.
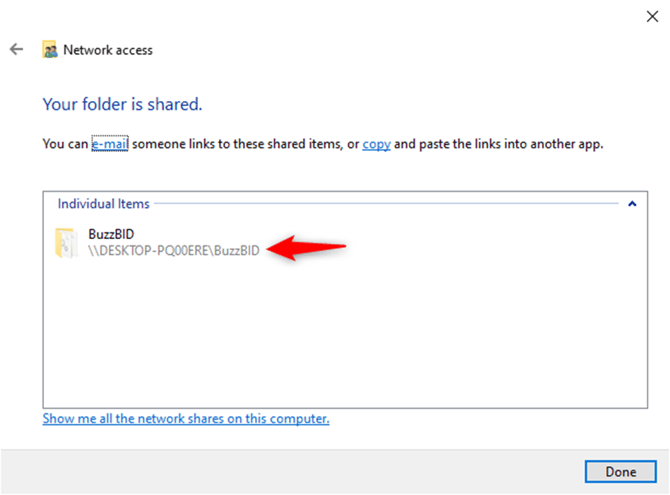
Once completed, you will receive a confirmation that your folder is shared on the network, along with its location. You will use this location information to place into BuzzBID so that the app can find where the plans are located.
Installing the SQL Server
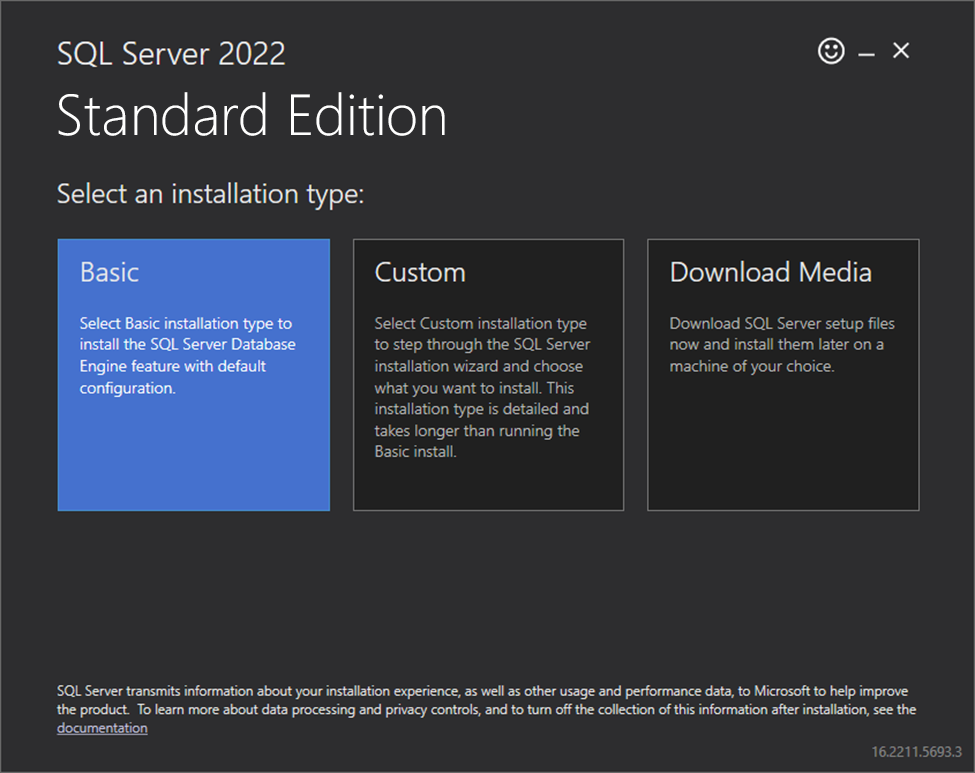
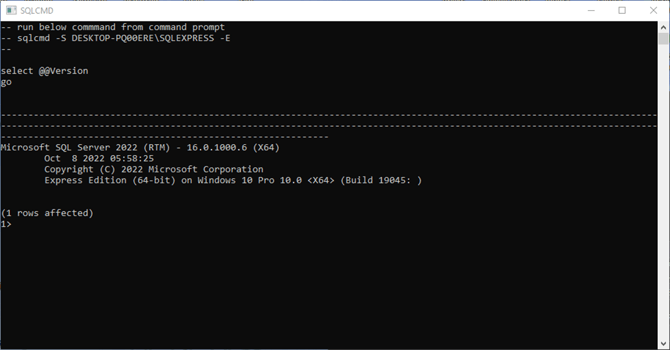
To set up an SQL Server, download the installation from Microsoft and run the installation.
Select Basic for to install SQL Server with default configuration.
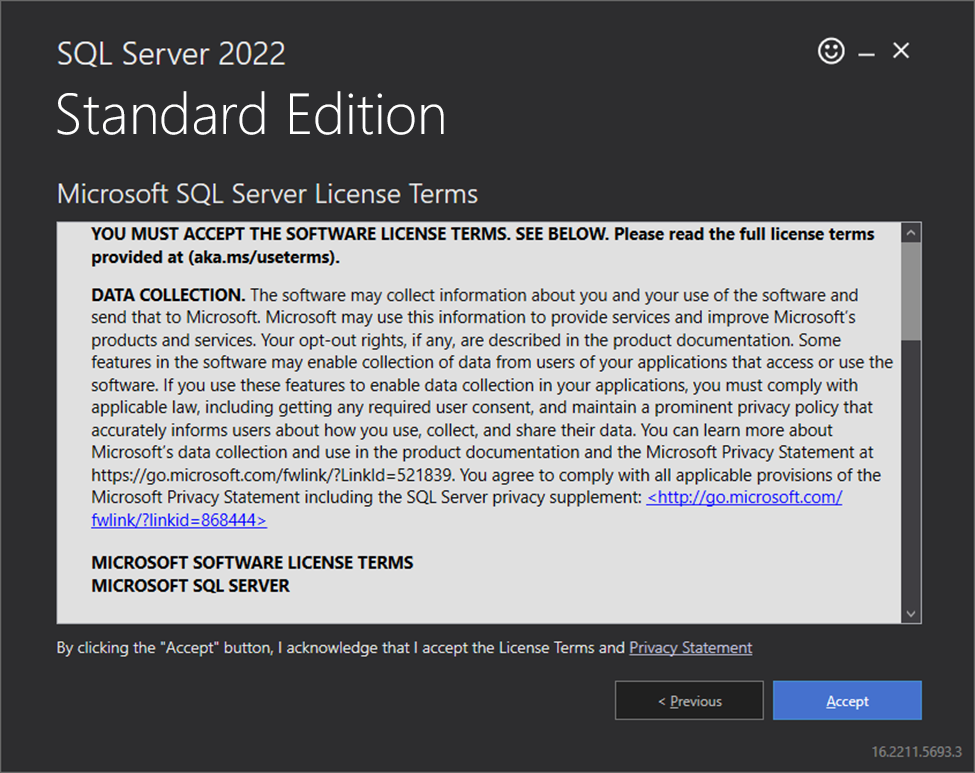
Read the End-User Agreement and click Accept.
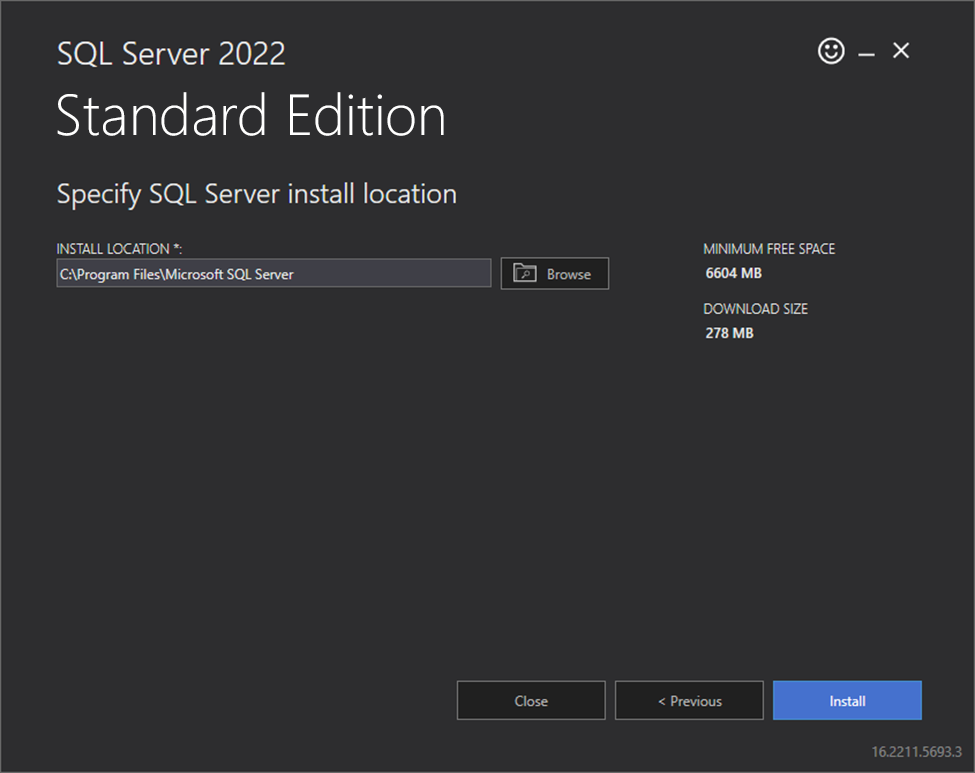
Select the folder where you will install the SQL Server, then click Install.
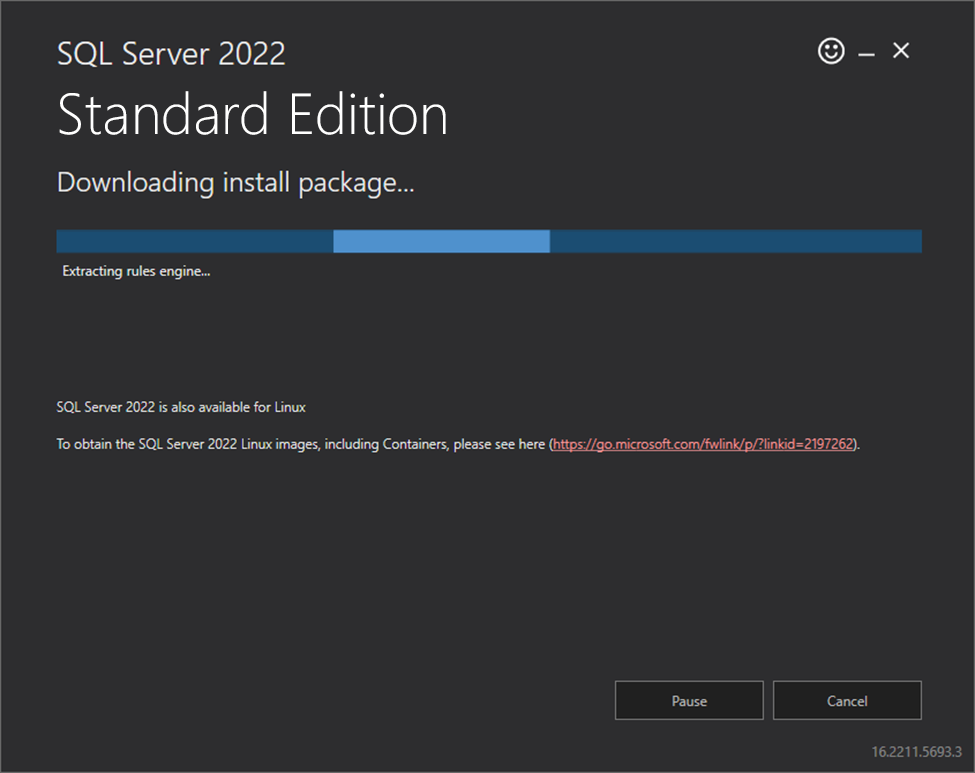
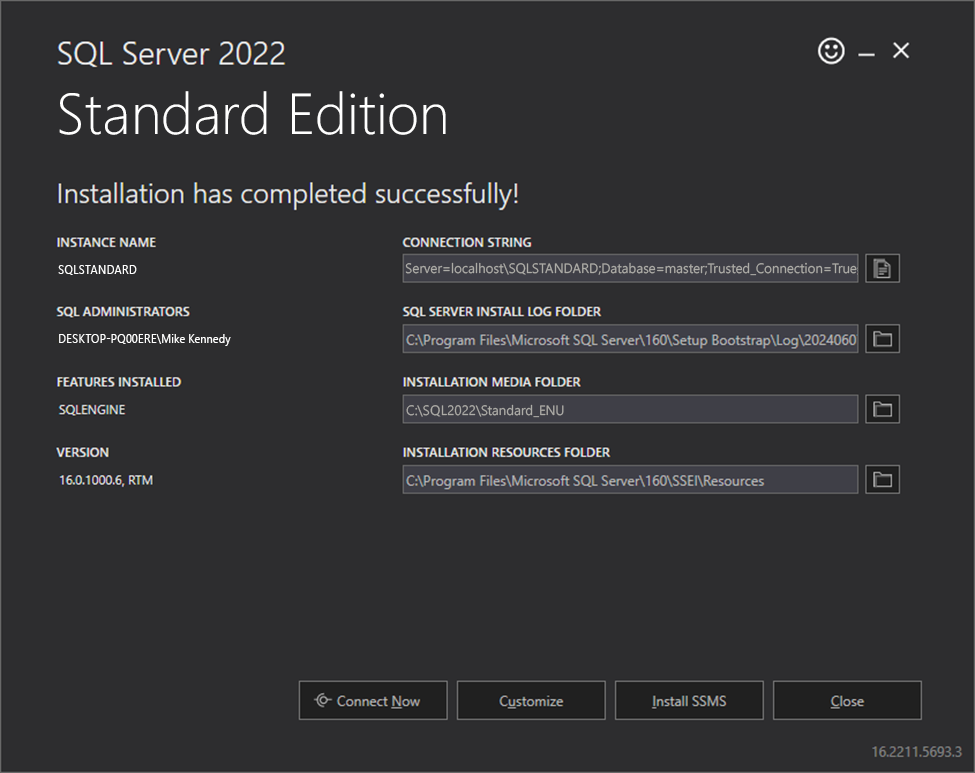
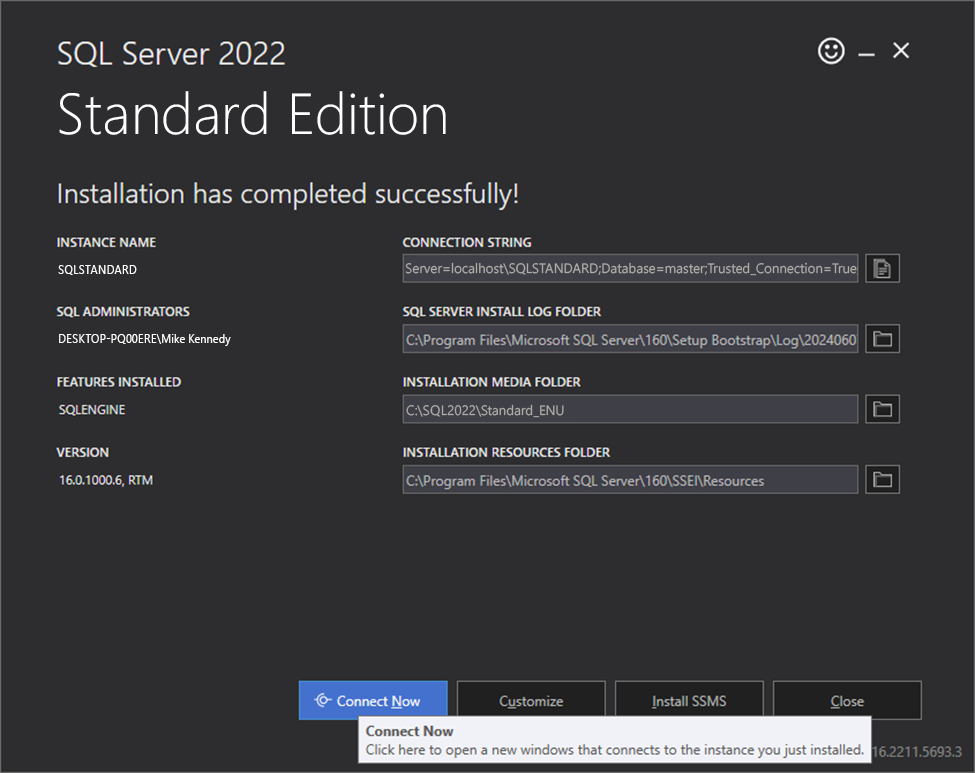
Wait for the installation to finish.
Installing the SQL Server Management Studio
Download the SQL Server Management Studio (SSMS) from Microsoft and run the installation.
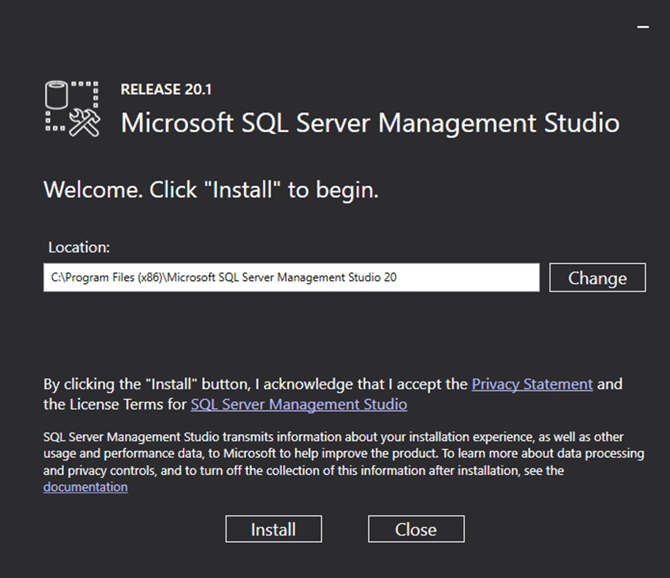
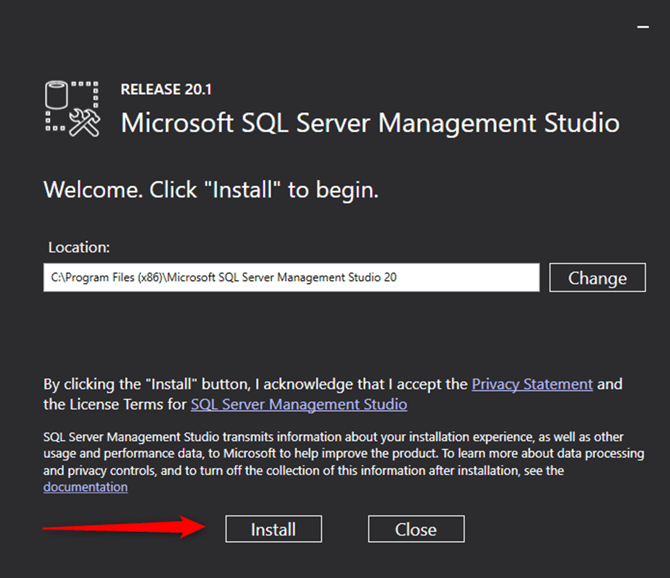
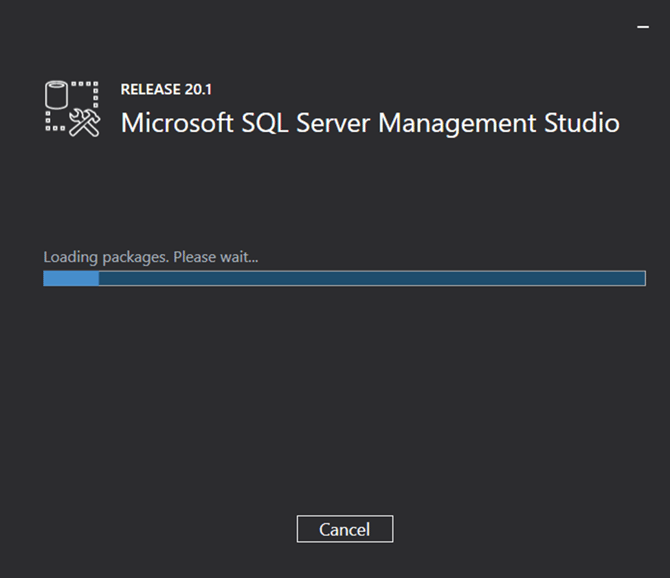
Click Install and wait for the process to finish.
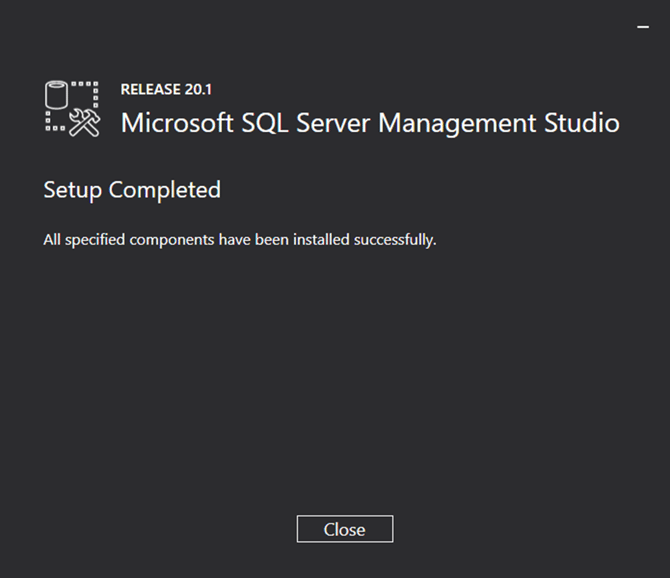
Once you have both apps installed, you need to set up the SQL Server, the SSMS, and Windows Firewall.
Setting up the SQL Server
After the installations have been completed, you need to manually set up the SQL Server’s Name and Authentication method. But before you can connect successfully, you first need to configure the SQL Server to send and receive connections.
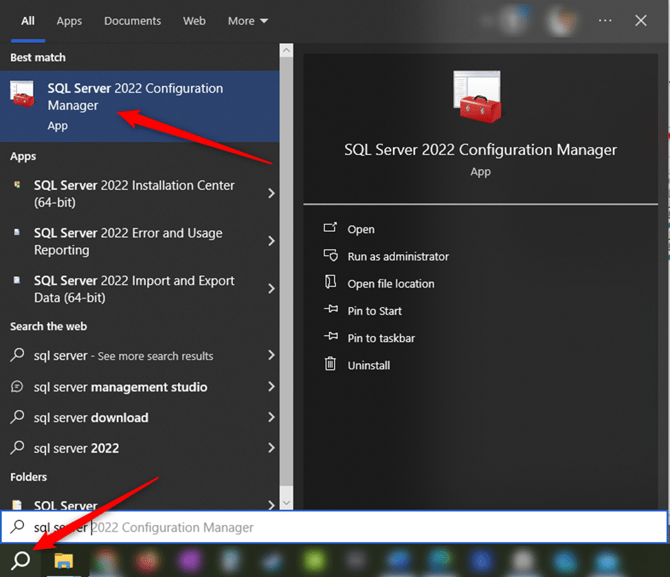
Click Search in the Windows icon tray > Type SQL Server Configuration Manager > open the app.
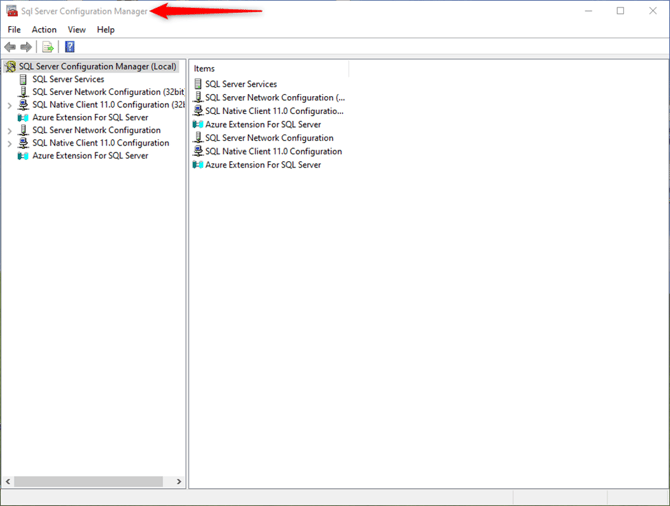
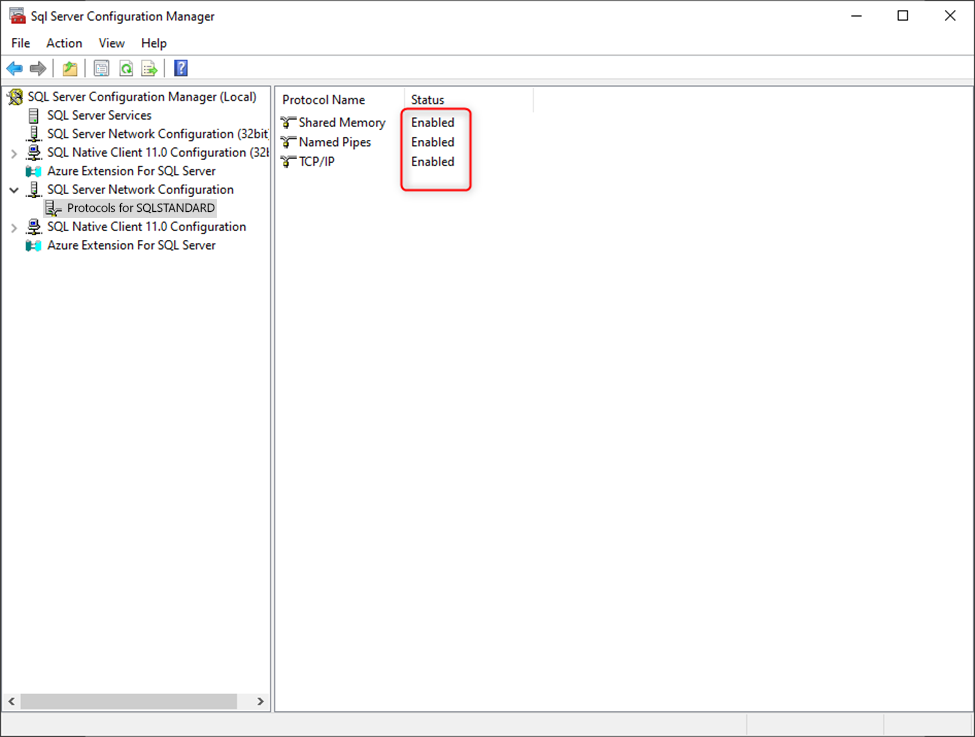
You then need to expand the SQL Server Network Configuration > click Protocols for SQLSTANDARD.
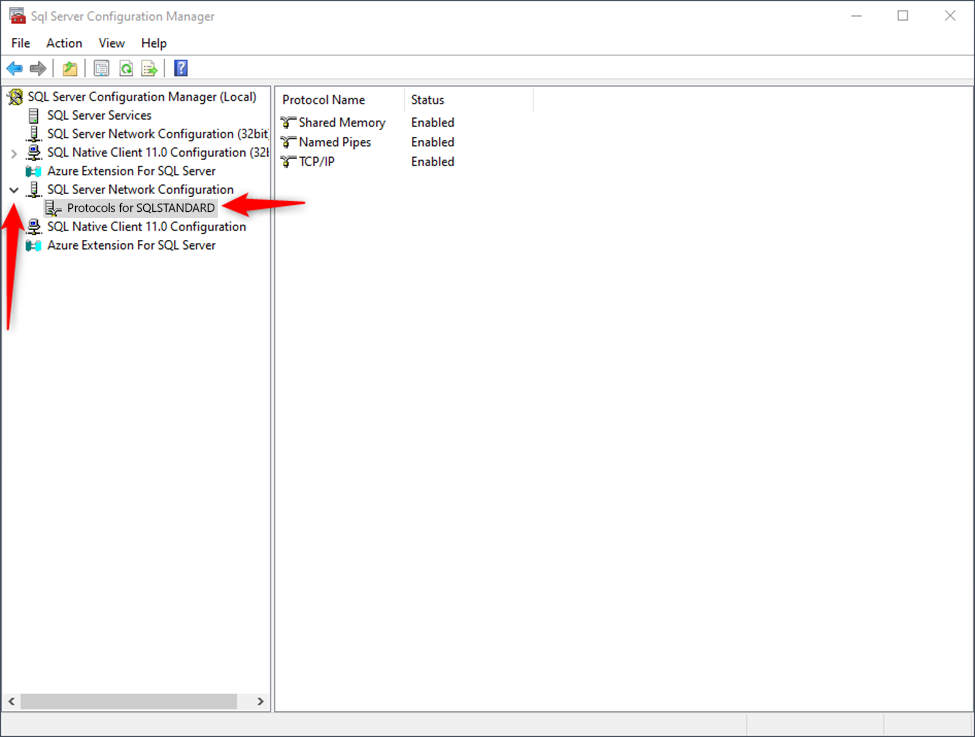
Make sure all three items have their statuses enabled, otherwise, other PCs cannot connect to the SQL Server.
Quick Tip
If you’re installing the SQL Server for the first time, you don’t need to update TCP Ports. The SQL Server will use the default TCP Port, which is 1433.
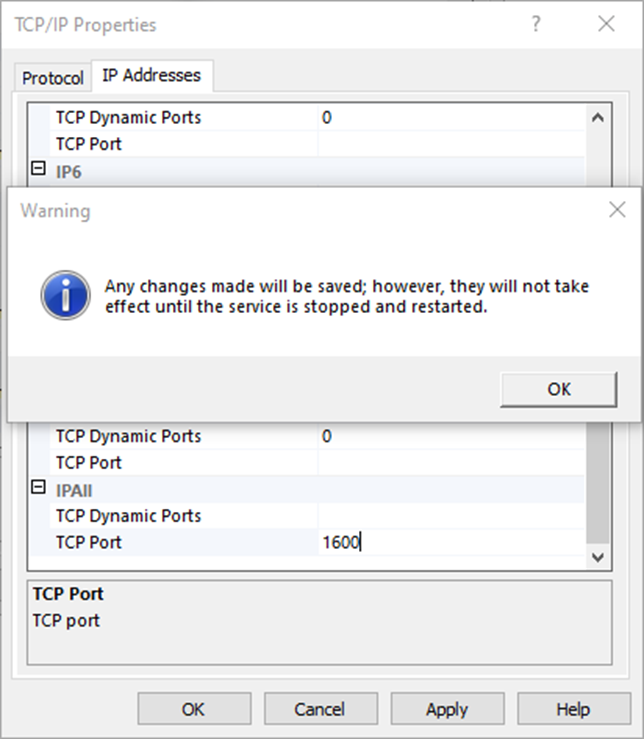
Then, double-click on the TCP/IP option > switch to the IP Addresses tab > scroll to the end of the list. Here you will need to configure TCP Dynamic Ports and TCP Port.
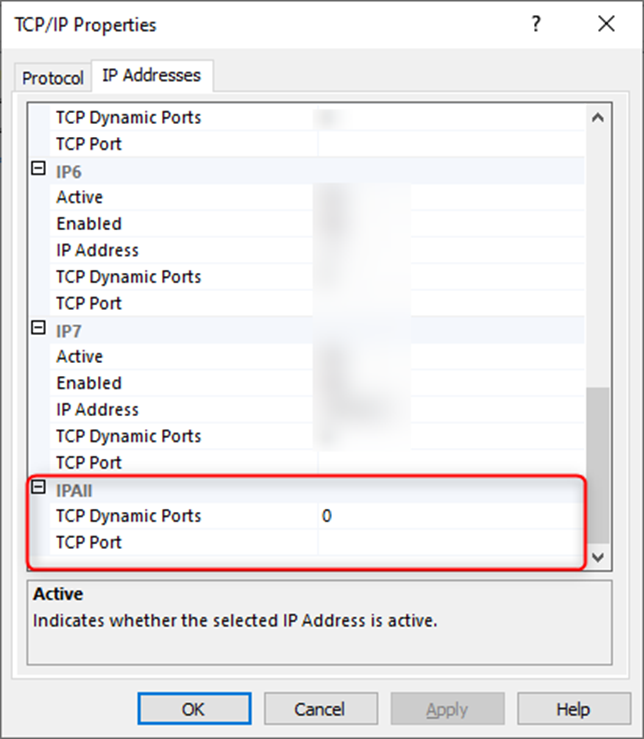
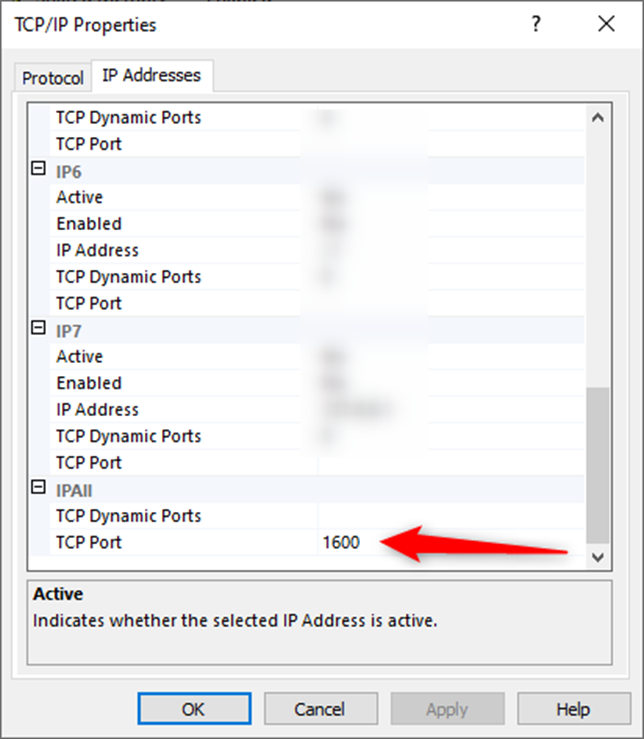
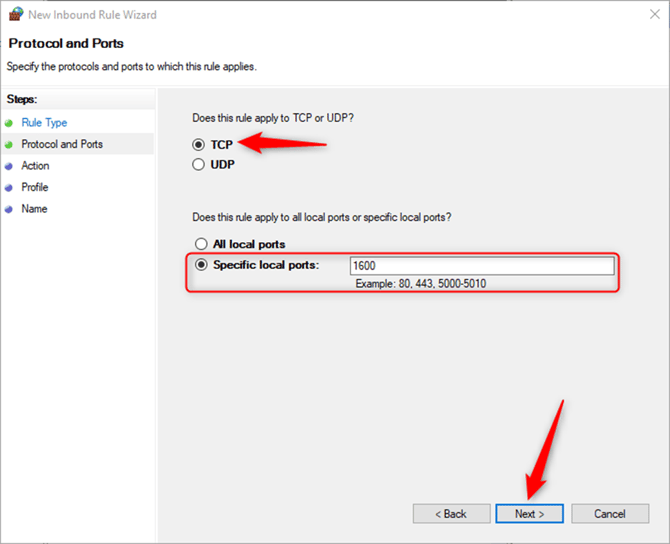
In the TCP Dynamic Ports you should delete the 0, and you can specify the TCP Port. Later, you will use this TCP Port to configure your Windows Firewall. For our demo, we put 1600 as the TCP Port.
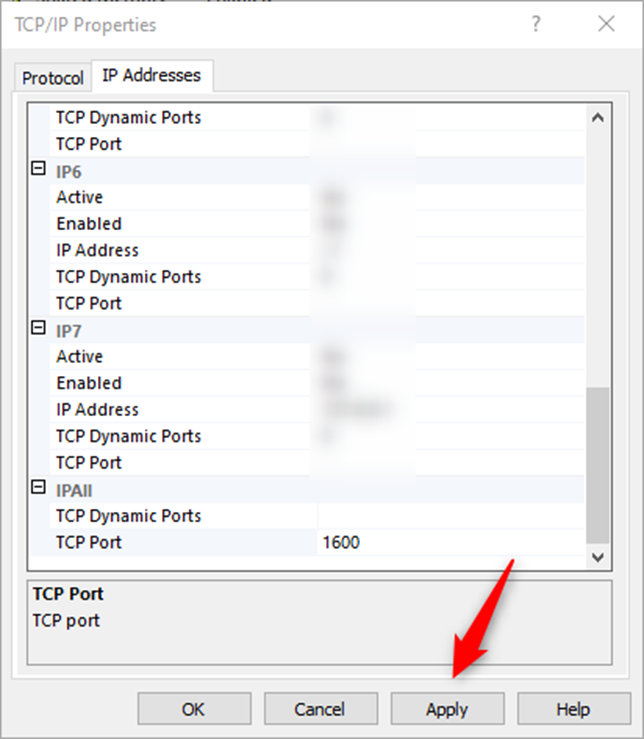
Click Apply and restart the SQL Server Configuration Manager by turning closing then opening the app.
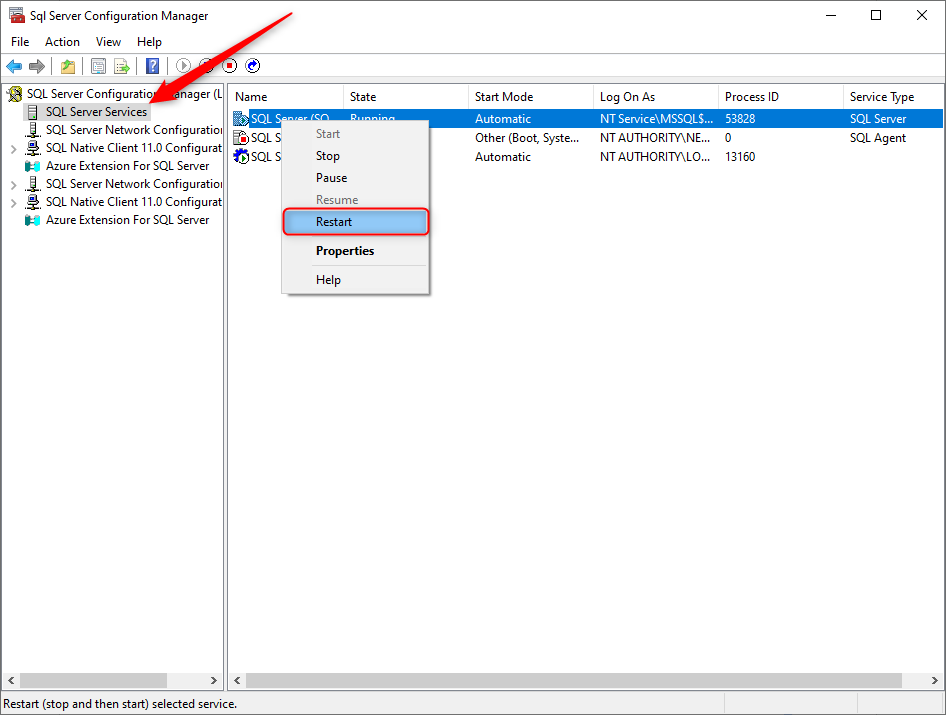
Once you update the TCP Port, you should restart the SQL Server. Go to the SQL Server Services > right-click on your SQL Server > select Restart.
Next, you need to configure your Windows Firewall to make an exception so that other PCs can connect to the one that has BuzzBID databases.
Setting up Windows Firewall
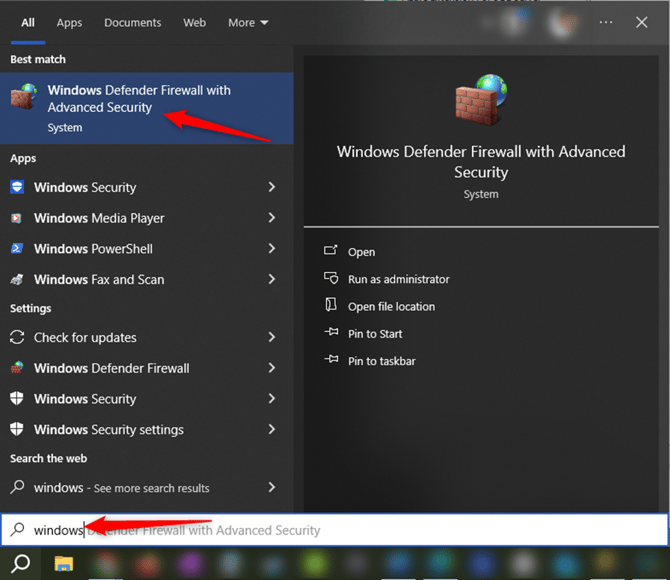
Click the Search button in Windows Icon Tray > type Windows Defender Firewall > Open the app.
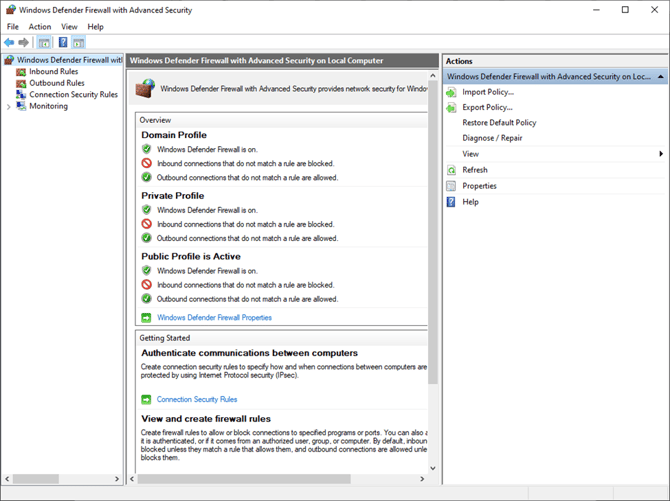
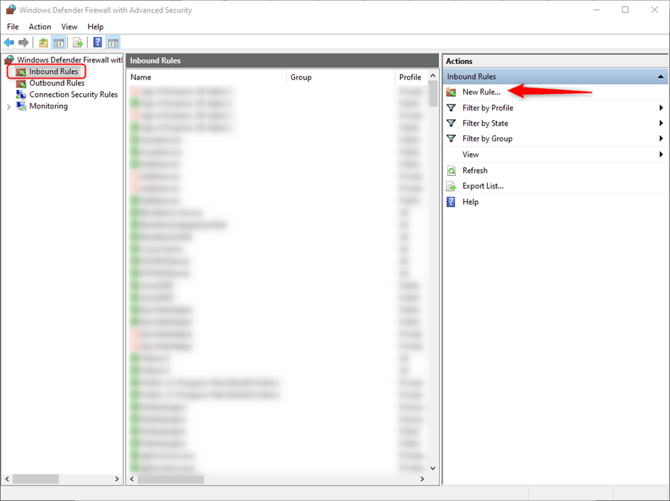
Click Inbound Rules > New Rule.
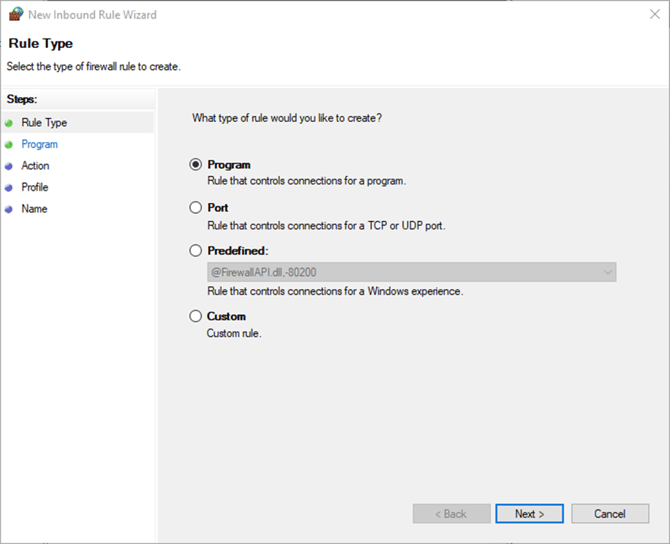
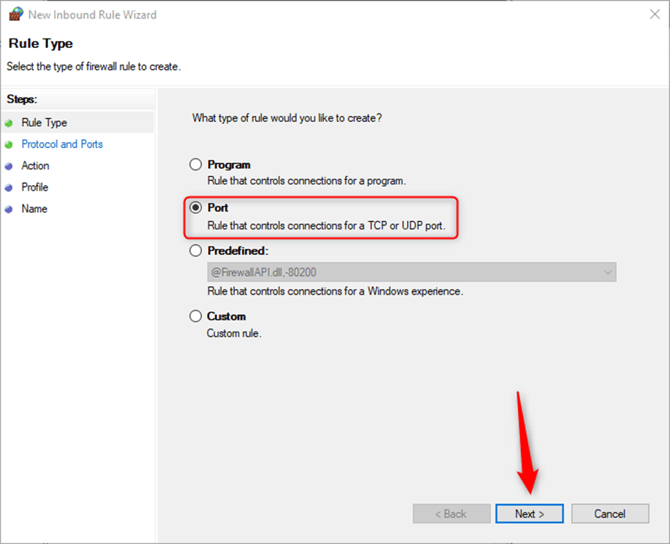
Select Port > click Next.
Select TCP, then type the Port Number where you set up your SQL Server. In our case, it’s 1600. Then, click Next.
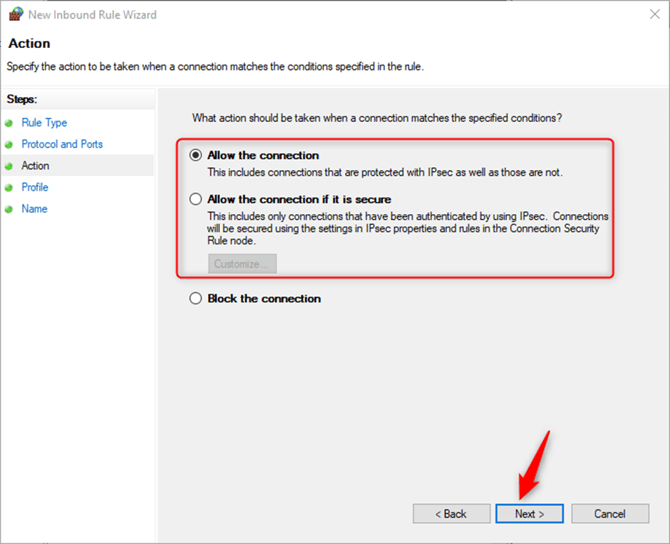
Choose either to allow the connection, or allow if it’s secure, depending on the security workflow you have established, then click Next. For this guide, we selected to allow all connections (the first option).
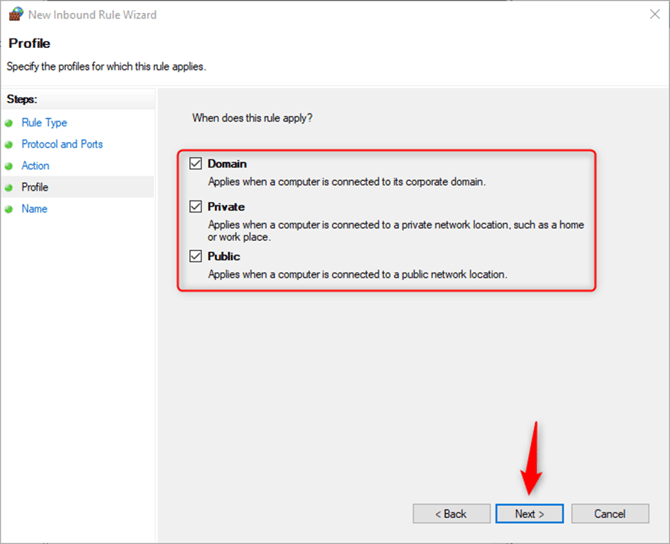
Choose how and when to apply this rule, then click Next.
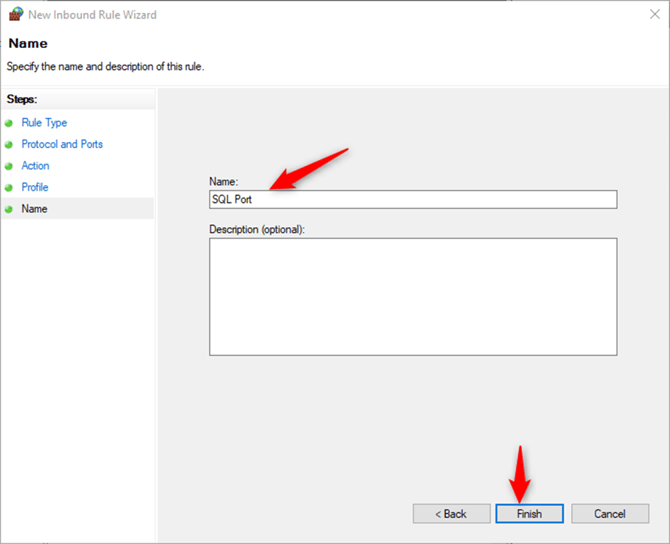
Name your new rule, then click Finish.
Go through the same process for the Outbound Rules.
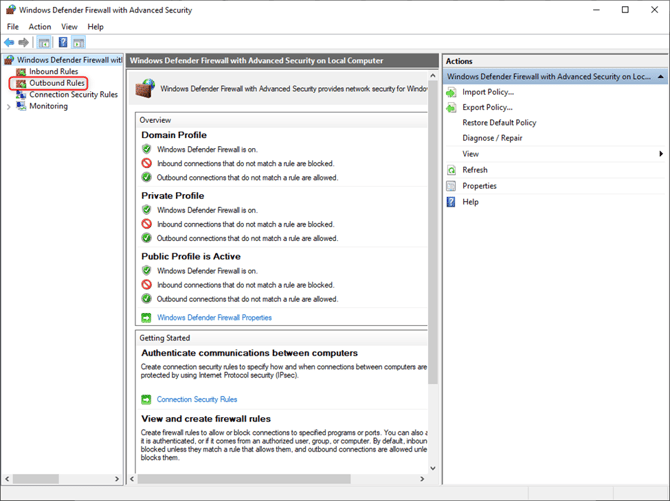
Now, the SQL Server can use this port to communicate with other PCs on LAN.
Quick Tip
Make sure all PCs connecting to the SQL Server are on the same network.
Setting up SSMS
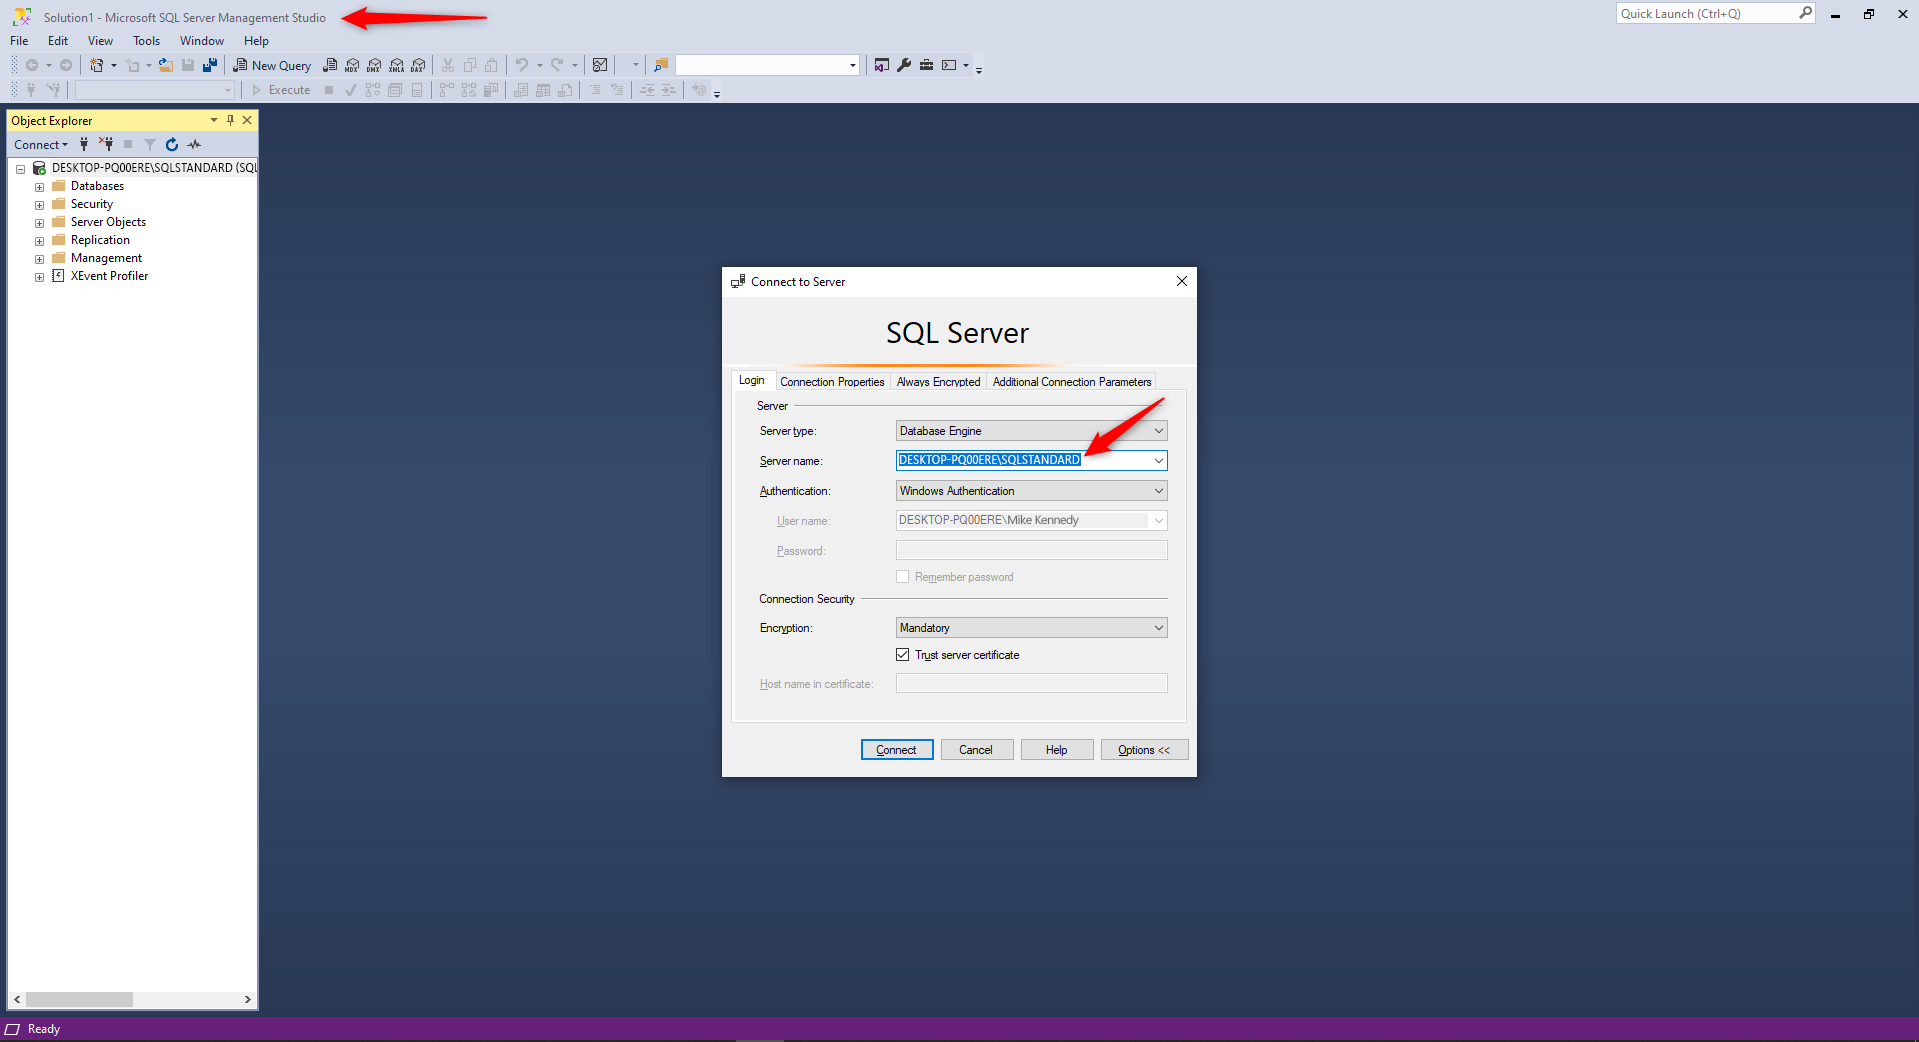
Next, open the SSMS application to set up login details. If you are setting up the SQL Server for the first time, you will immediately see the following window.
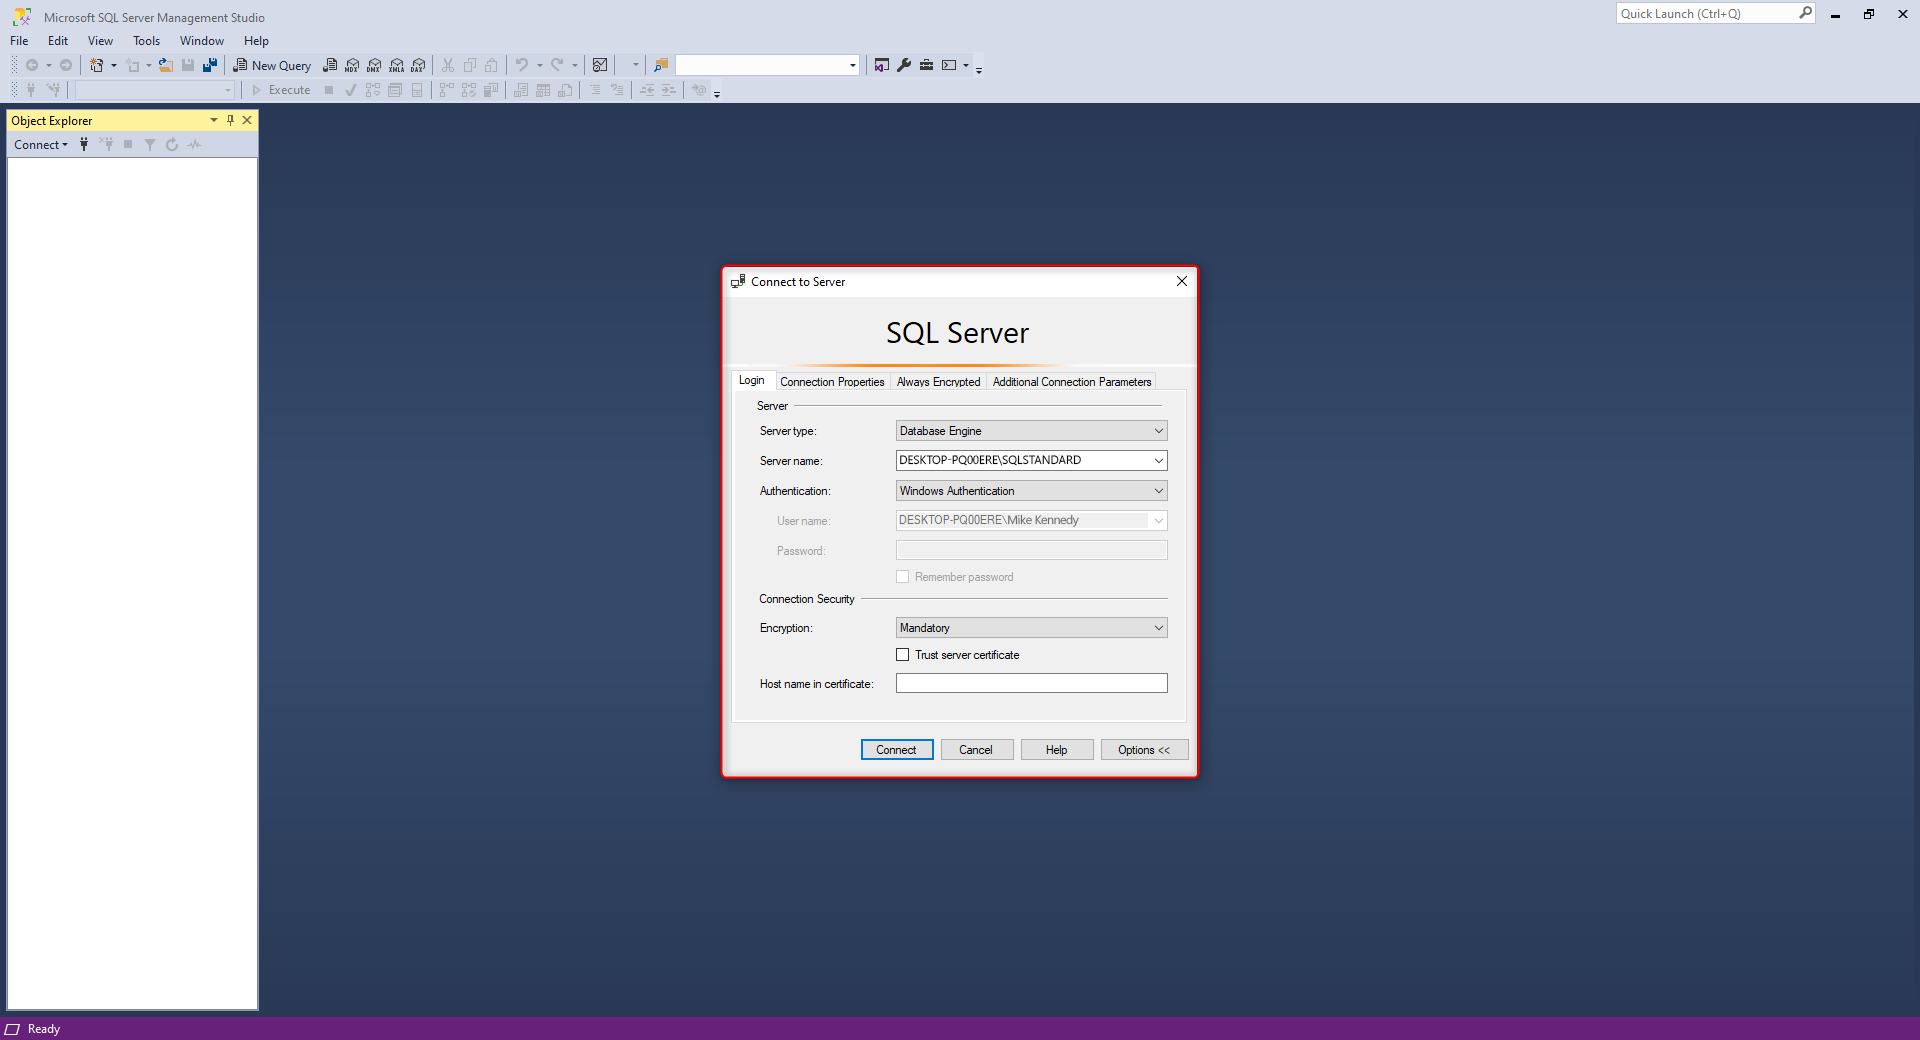
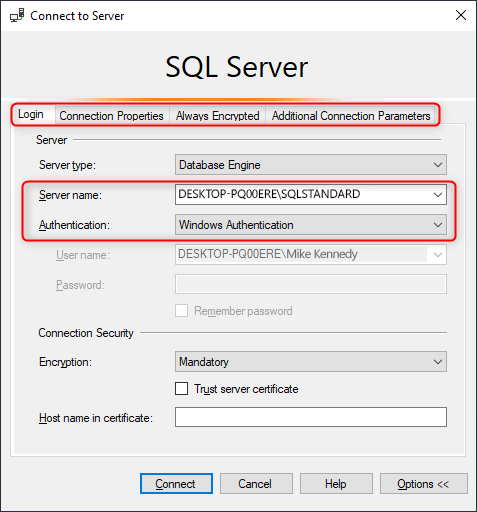
This window allows you to set up the SQL Server. We will focus on the Login tab now, but there are other parameters you can set up too. The most important parameters are Server Name and Authentication method.
Quick Tip
You can also use the local IP address in the Server name cell, followed by the TCP/IP Port, for example: 127.0.0.1, 1600
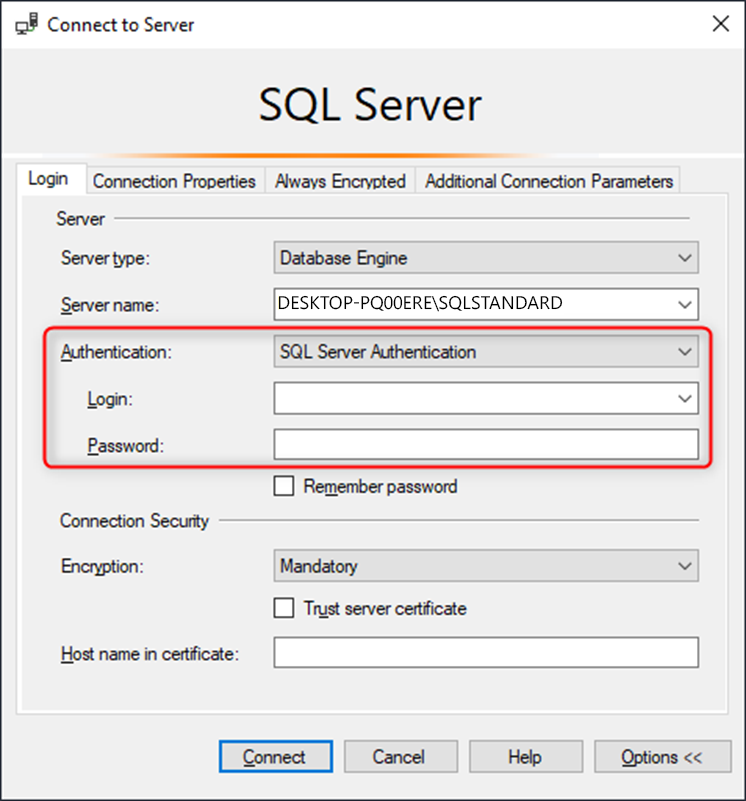
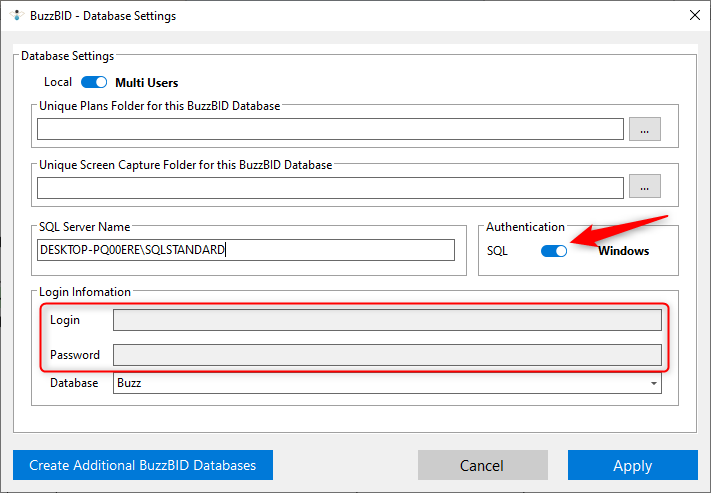
If you choose Windows Authentication, you don’t need to set up the Password. If you choose the SQL Server Authentication, you will need to set up Login and Password.
Finalizing the Setup
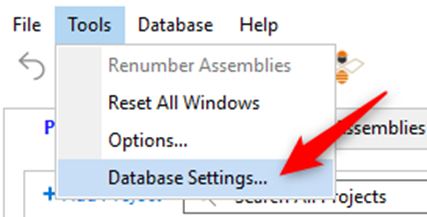
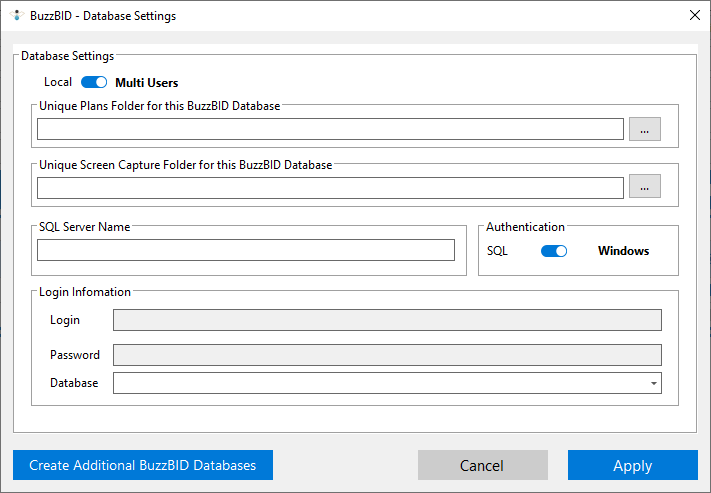
If you set up everything properly, open BuzzBID and try to connect to the SQL Server. Click Tools > Database Settings to open a window where you can add the necessary information.
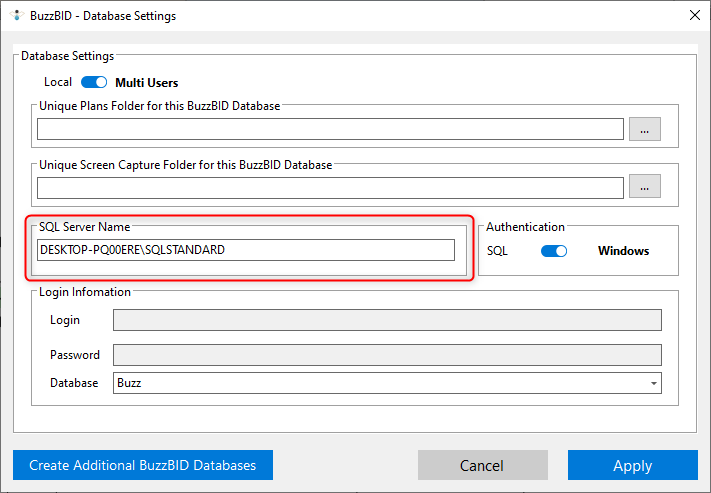
Add the SQL Server Name from the SSMS application.
Quick Tip
If you set up the SQL Server in a way that you need to use ports, place a comma immediately after the SQL Server name, then add the port.
Ex. DESKTOP-PQ00ERE\SQLSTANDARD, 1600
If you chose the SQL Server Authentication, add Login and Password. If you chose Windows Authentication, this section is greyed out both in SSMS and BuzzBID.
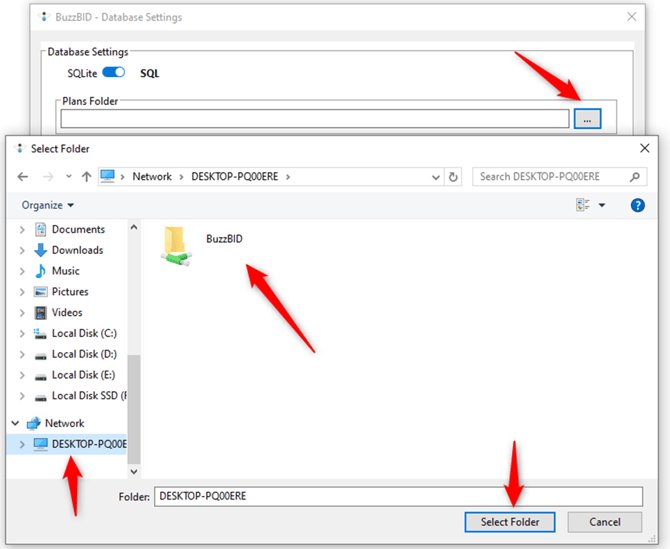
Click on the 3 dots and choose the Plans Folder on the Network.
BuzzBID will automatically add the Screen Capture folder.
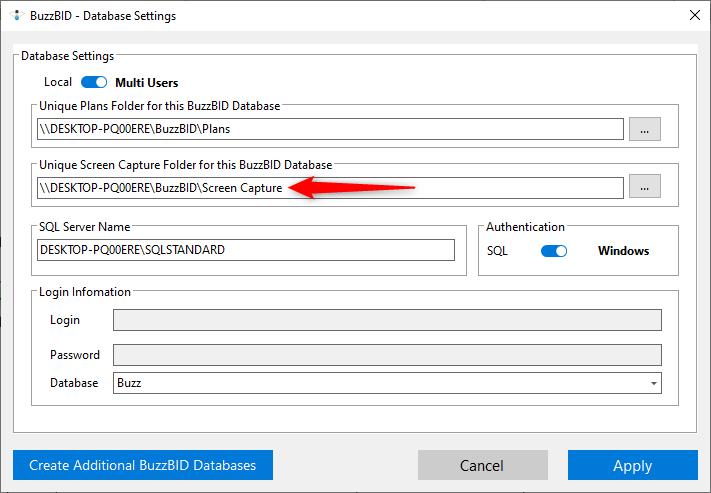
Since we are setting up the SQL Server for the first time, there is no database to access yet, so the Database drop-down menu is empty.
However, you can write a name for the database > click Apply and BuzzBID will create a new database for you. This database creation also means that the PC where you first create the database will also be the Admin for that database.
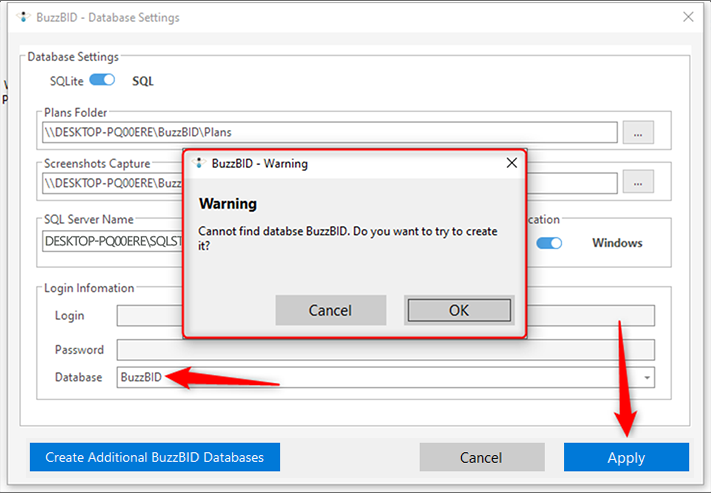
Once the process is completed, you will receive a message stating that the database has been created.
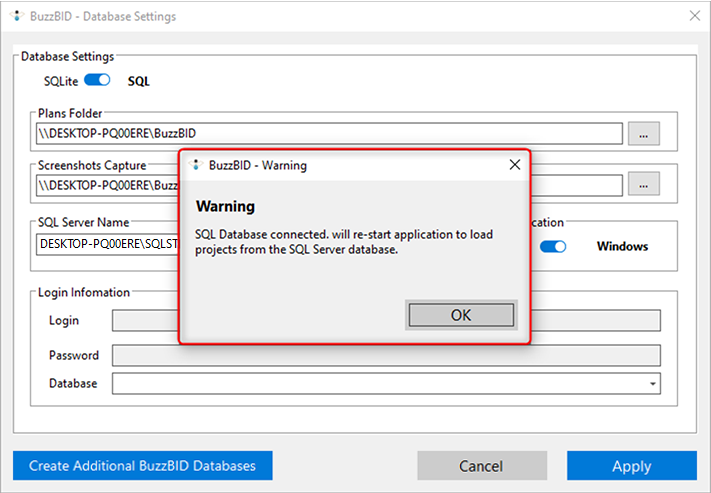
Now you have the database set up, and others can connect to it.
Quick Tip
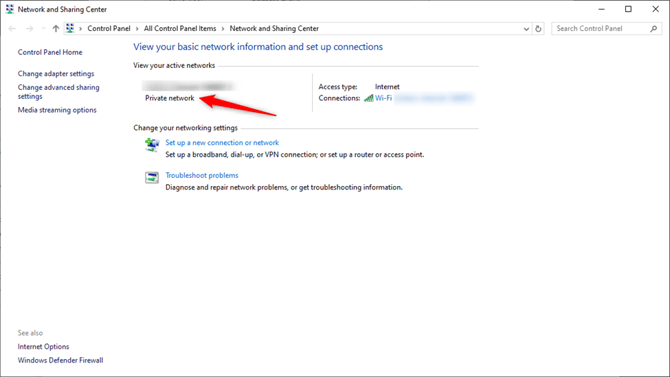
Make sure the network all PCs are connecting to is private network; otherwise you may have trouble seeing the shared folders.
If you need to stop sharing a folder, click Search on the Windows Icon Tray > type Computer Management > navigate to Shared Folders > Shares > right-click to open a menu where you can choose to stop sharing a folder so it doesn’t appear in the LAN any longer.
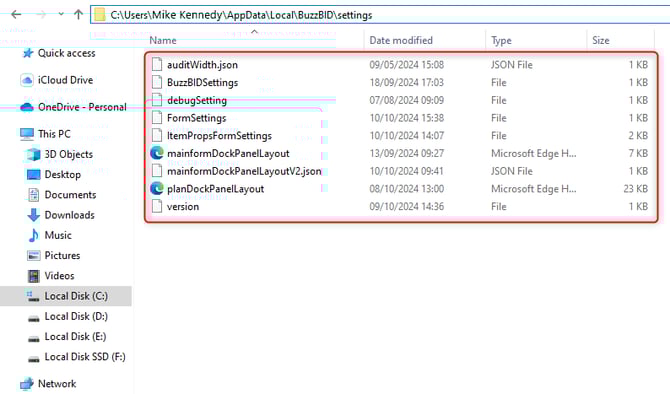
Also, if you are running the Multi-User feature in a virtual machine environment, please note that the following settings need to be made permanent so that BuzzBID can retain database settings.
These settings are saved at the following location: C:/Users/[USER]/AppData/Local/BuzzBID/settings
Updating BuzzBID in the Multi-User Environment
Since we are publishing regular and frequent updates, there are a couple of settings you should implement in order to have a streamlined updating workflow.
Quick Tip
- Update the Admin User first! This user has access rights to the SQL database. If other users attempt the update first - they can encounter errors.
- After the update is complete, update connected users.
Start the SQL Server Management Studio > connect to your Server. Then, expand the BuzzBID database.
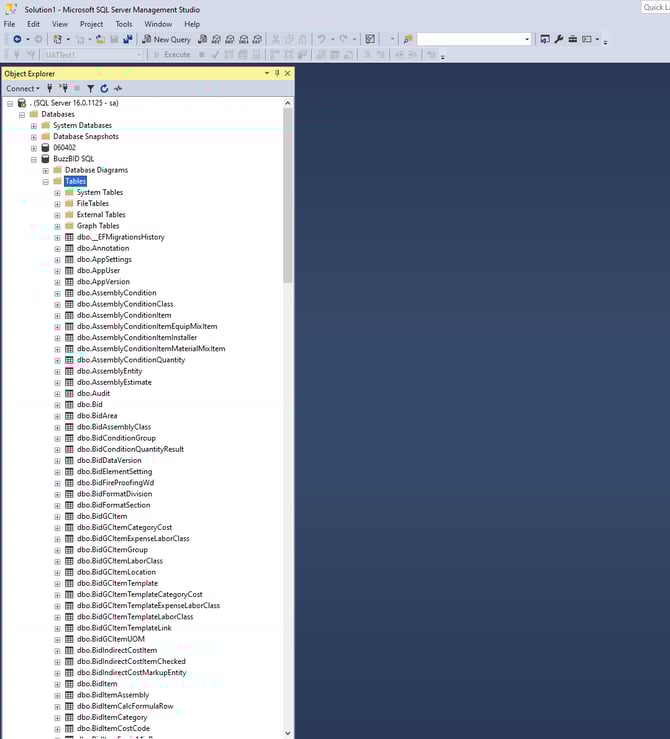
In the Tables folder, find the table 'dbo.ConnectedUsers' > right click on it > select Edit Top 200 Rows.
-png.png?width=670&height=760&name=image%20(1)-png.png)
Then, select the record in the Table > right-click > select the Delete option > click Yes to confirm.
-png.png?width=670&height=384&name=image%20(2)-png.png)
-png.png?width=670&height=350&name=image%20(3)-png.png)
This method will allow separate apps on both Admin and User levels to update without any issues.