![Knowledge Centerx2-1.png]](https://knowledge.buzzbid.com/hs-fs/hubfs/Knowledge%20Centerx2-1.png?height=50&name=Knowledge%20Centerx2-1.png)
What the Archive feature does
The Archive feature moves completed or inactive projects out of the active Projects list and creates a separate archive file in the folder assigned to that BuzzBID database. Archived projects can later be viewed through the green Recycle Bin, restored to BuzzBID, or permanently deleted.
Important: Archiving helps keep the project list organized, but it does not replace regular backups of your BuzzBID databases and company files.
For single-user installations, review our guide to protecting your BuzzBID data.
Choose a dependable archive location
The archive folder should be secure, included in a reliable backup process, and available whenever someone needs to archive or restore a project. Every affected user must have permission to read and write to the folder. Make sure the location has enough free space, and avoid changing its folder name or path after it is connected to BuzzBID.
Recommended locations include:
• A company file share or network drive that is centrally managed and backed up.
• A company cloud-drive folder, such as OneDrive/SharePoint, Google Drive, or Dropbox, that is synced to Windows and available when BuzzBID is used.
• A managed server or network-attached storage (NAS) location that is included in the company's backup plan.
• An external drive only when it is secured, uses a consistent drive letter, stays connected when needed, and is backed up to another location.
Avoid local folders that are not backed up, Downloads or temporary folders, personal cloud accounts, and removable drives that are regularly disconnected. If you are unsure, ask your IT administrator to choose the approved location.
Plan the folder structure before continuing
Create one archive folder for every BuzzBID database. Multiuser companies also need a separate database-folder set for each estimator. A simple structure is: BuzzBID Archives > Estimator Name > Database Name Archive.
Part 1: Find your BuzzBID database names
Open the Database list in BuzzBID
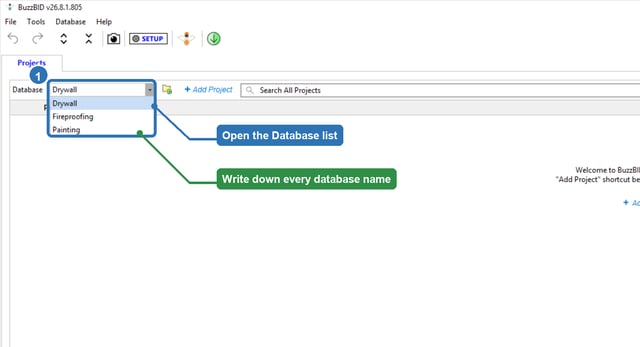
- On the Projects tab, select the arrow at the right side of the Database box.
- Write down every database name shown in the list. You will create one archive folder for each name.
Example: The picture shows three databases: Drywall, Fireproofing, and Painting.
Part 2: Create the archive folders in Windows
Open File Explorer
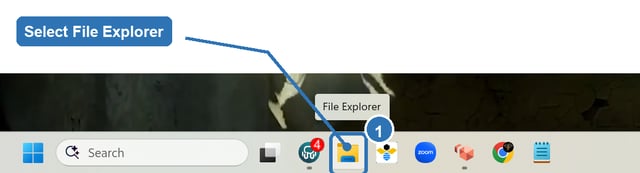
- Look at the taskbar along the bottom of the Windows screen and select the yellow File Explorer folder icon.
- If you do not see it, select the Windows Search box, type File Explorer, and open the File Explorer app.
Go to a safe, backed-up location
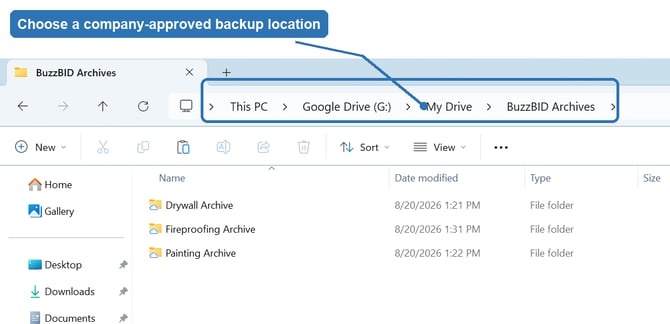
- In File Explorer, open the company-approved location where archives will be stored, such as a company file share or a synced cloud-drive folder.
- Create or open a main folder named BuzzBID Archives.
Important: Do not use a temporary location. The archive location should be backed up and available whenever you use BuzzBID.
Create one folder for each database
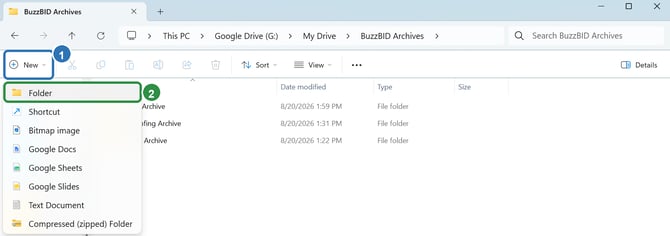
- Select New, then select Folder.
- Type the database name followed by Archive, such as Drywall Archive, and press Enter. Repeat until every database has its own folder.
Multiuser: If your company uses Multi Users, each estimator needs a separate set of database archive folders.
Part 3: Connect each archive folder to BuzzBID
Open Database Settings
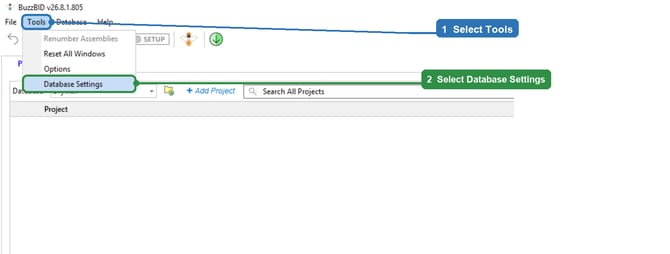
- Return to BuzzBID and select Tools from the top menu.
- Select Database Settings.
Choose the database you are setting up
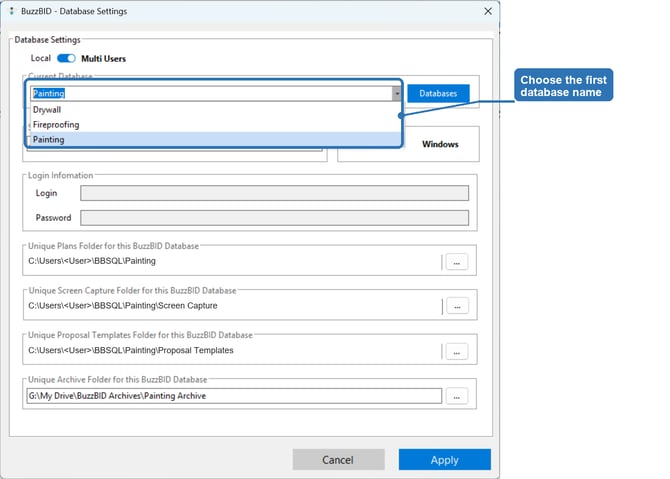
- In Current Database, open the list and select the first database name you wrote down.
Browse for that database's archive folder
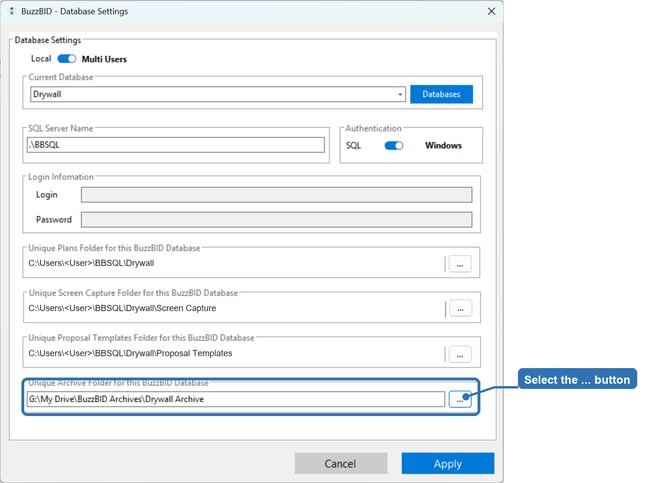
- Find Unique Archive Folder for this BuzzBID Database and select the ... button on the right.
Select the matching folder
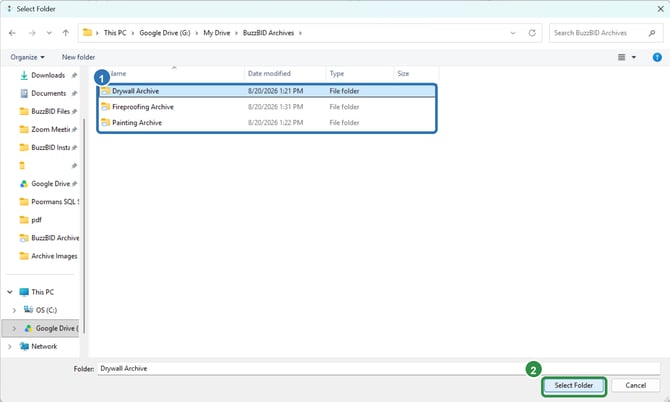
- Open the folder that matches the selected database, then select Select Folder.
Check the name: If Current Database is Drywall, choose Drywall Archive. Do not choose another database's folder.
Apply the setting and repeat
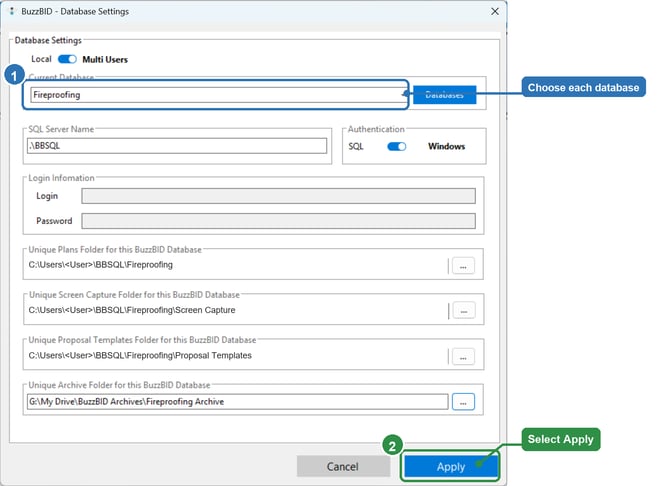
- Select Apply to save the archive location.
- Choose the next Current Database and repeat the folder-selection steps until every database has the correct archive folder.
Multiuser: Repeat the setup for each estimator, using that estimator's own archive-folder set.
Part 4: Archive a project
Open the Archive command
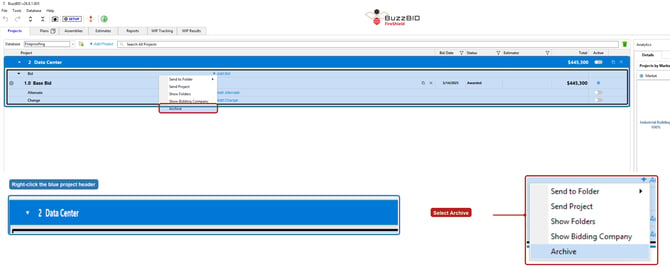
- On the Projects tab, switch to the database that contains the project, then right-click the blue project header.
- Select Archive from the pop-up menu.
Confirm the project or projects
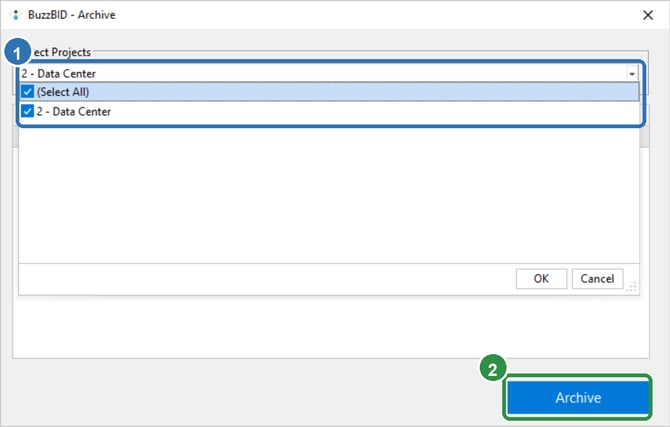
- Check the project or projects you want to archive. Use Select All only if every listed project should be archived.
- Select Archive.
Wait for archiving to finish
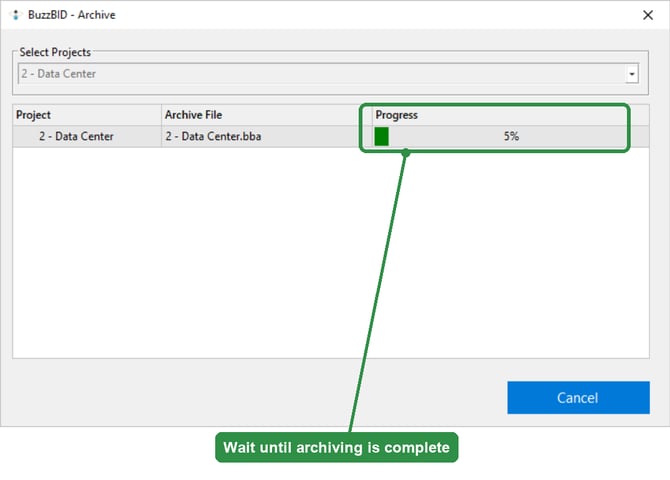
- Keep BuzzBID open until the progress finishes. Do not close the window while the archive file is being created.
What happens next: The project leaves the active project list and becomes available in Archived Projects.
Part 5: View and manage archived projects
Open the Recycle Bin
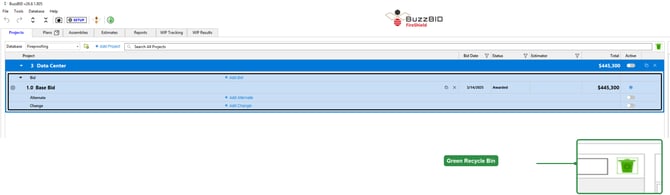
- On the Projects tab, select the green Recycle Bin at the far right end of the Search All Projects bar.
Open Archived Projects
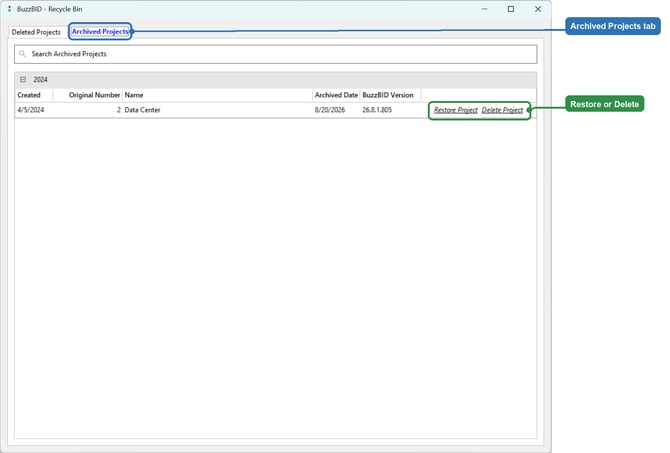
- Select the Archived Projects tab. Use the search box or expand a year to find the project.
- Select Restore Project to return it to BuzzBID, or select Delete Project only when permanent deletion is intended.
Restore an archived project
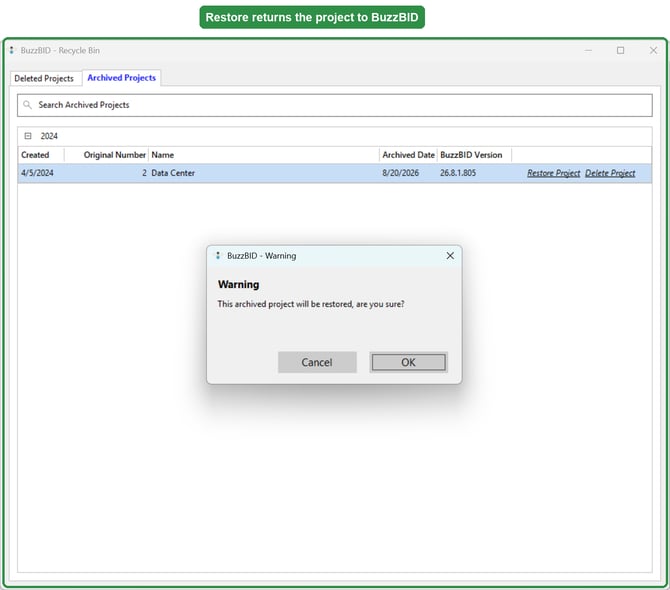
- After selecting Restore Project, review the warning and select OK. The project returns to BuzzBID.
Permanently delete an archived project
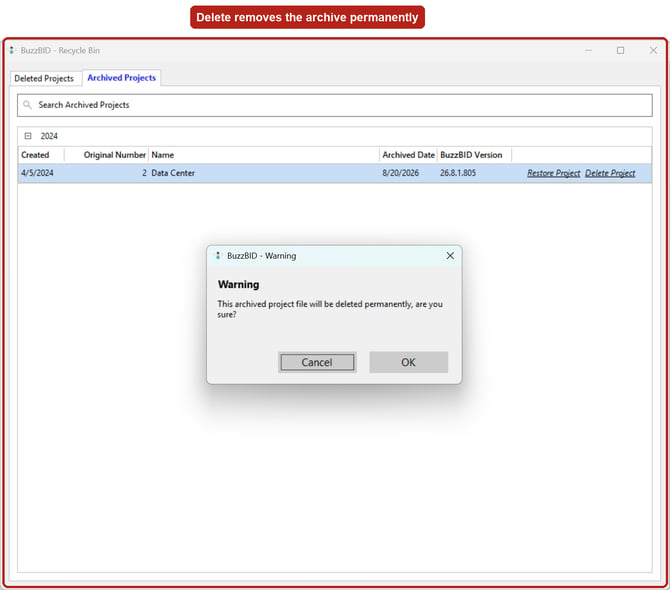
- After selecting Delete Project, review the warning. Select OK only when the archive file should be permanently removed.
Warning: A project deleted from Archived Projects cannot be restored from the BuzzBID Recycle Bin.
Quick check before you finish
- Every BuzzBID database has its own archive folder.
- The folders are stored in a safe, backed-up company location.
- Each Current Database is connected to the folder with the matching name.
- Multiuser estimators have separate folder sets.
- Permanent deletion is used only when the archived project is no longer needed.