![Knowledge Centerx2-1.png]](https://knowledge.buzzbid.com/hs-fs/hubfs/Knowledge%20Centerx2-1.png?height=50&name=Knowledge%20Centerx2-1.png)
Beginning Saturday, November 7, 2026 at 1 a.m. Central, the enterprise identity system used in the BuzzBID application will extend to Customer Center, Support Center, and Knowledge Center. This enhanced sign-in experience will add security and convenience across your BuzzBID customer services.
Use your existing BuzzBID email address and password, or sign in with a passkey using your fingerprint, face, or device PIN. If you already have a passkey for the BuzzBID application, the same passkey will work for Customer Center. You can also use your existing passkey to access Support Center when opening Create Support Ticket or Knowledge Center from the BuzzBID app.
When you sign in to Customer Center with your email address and password, you will also verify your identity with an email code. Signing in with a passkey skips the password and email-code steps. Support Center does not request the Customer Center email code.
The screenshots below show a test environment. Test account identifiers have been hidden.
Step 1: Enter your email address
- Open Customer Center. You will see the Log in Customer Center page.
- Enter your email address and select Continue.
If you have forgotten your password or need to set one up for the first time, select Forgot Current or Setup New Password.
If you already have a passkey, select Continue with a passkey. Your browser may also offer your passkey automatically. Signing in with a passkey skips the password and email-code steps.
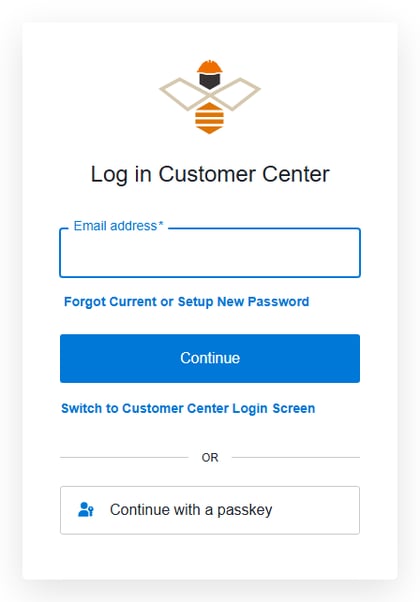
Enter your email address or continue with an existing passkey.
Step 2: Enter your password
- Check the email address shown at the top. Select Edit if you need to change it.
- Enter your password and select Continue.
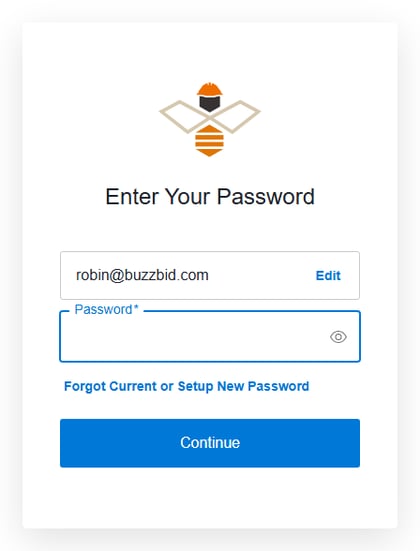
Confirm your email address, then enter your password.
Step 3: Enter your email verification code
- Check your inbox for an email with the subject Your authentication code.
- Enter the 6-digit code in Enter the code and select Continue.
If the email has not arrived, select Resend. You can select Remember this device for 30 days to avoid being asked for a code on that computer for the next 30 days.
Email is the default verification method. After signing in, you can add an authenticator app as another option, as described in Step 5. If you sign in with a passkey, you will not see this verification step.
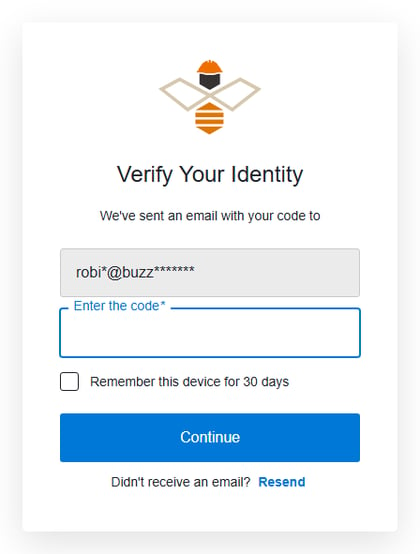
Enter the code sent to your email address.
Step 4: Create a passkey (optional)
If you do not have a passkey, you may be offered the option to create one after signing in.
- Select Create a passkey to sign in next time with your fingerprint, face or device PIN.
- Select Continue without passkeys to skip this step.
- Select Don't show me this again if you do not want to see this prompt again.
When you sign in with a passkey, you do not need a password or an email verification code.
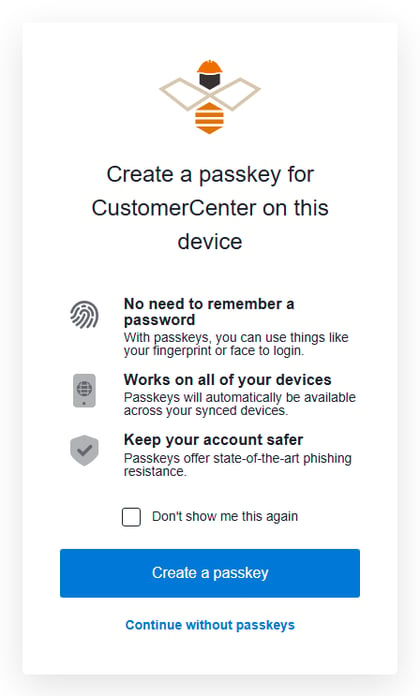
Create a passkey now or continue without one.
After signing in, you will arrive at Manage Users.
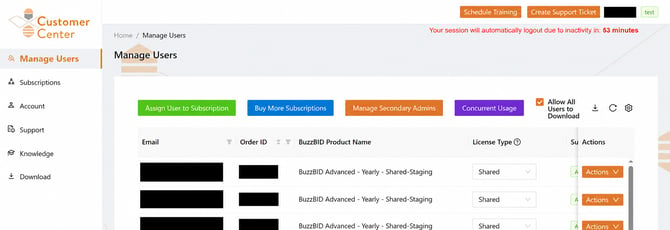
The Manage Users page after sign-in. Example account identifiers are hidden.
Step 5: Add an authenticator app (optional)
- Go to Account → MFA Methods. Email is listed as your default method.
- Select Add authenticator app to add an app such as Google Authenticator or Microsoft Authenticator.
- Confirm the change using the code sent to your email address.
After you add an authenticator app, you can choose between email and the app when you sign in. SMS verification is not available yet.
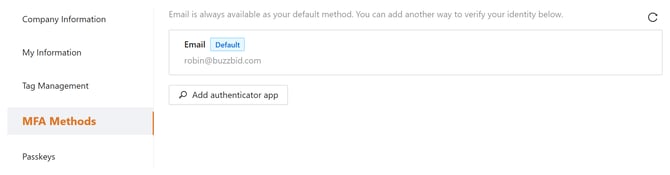
Add an authenticator app as another verification method.
Step 6: Manage your passkeys (optional)
Go to Account → Passkeys to view your passkeys. Passkeys let you sign in with your fingerprint, face or device PIN instead of a password.
- To remove a passkey, select Remove. You will need to confirm removal with an email code.
- To add a passkey, create one when prompted during sign-in, or use the BuzzBID desktop app.
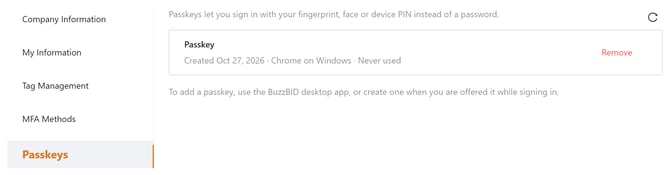
View and remove passkeys in your account settings.
Opening Support Center and Knowledge Center from the BuzzBID app
For added security, selecting Help → Create Support Ticket or Help → Knowledge Center in the BuzzBID app will open a sign-in page. You can use your existing BuzzBID credentials or a passkey for convenient access.
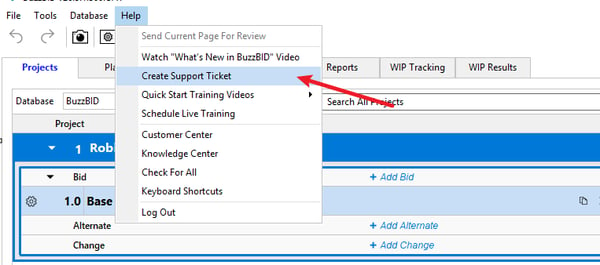
Open Create Support Ticket or Knowledge Center from the Help menu.
On the Log in Support Center page, use the same email address and password you use for BuzzBID and Customer Center. If you already have a passkey, you can use the same passkey instead.
Support Center does not ask for an email verification code. The email-code step described above applies to Customer Center only.
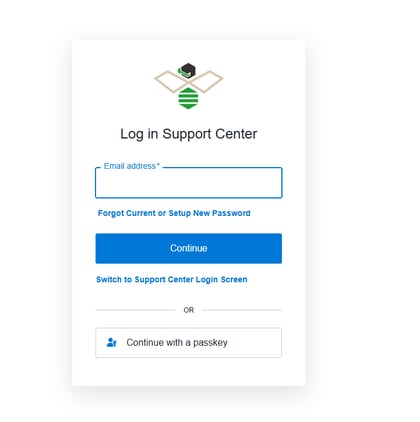
Sign in to Support Center with your existing BuzzBID credentials or passkey.
Need help?
For immediate assistance, call 713-244-8762.
- Chat with our AI BuzzBot for help.
- Email support@buzzbid.com for support or info@buzzbid.com for general questions.
- Create a support ticket to request help from our team.
If you cannot sign in, call or email us so we can help you regain access.