![Knowledge Centerx2-1.png]](https://knowledge.buzzbid.com/hs-fs/hubfs/Knowledge%20Centerx2-1.png?height=50&name=Knowledge%20Centerx2-1.png)
Quick Instructions
-
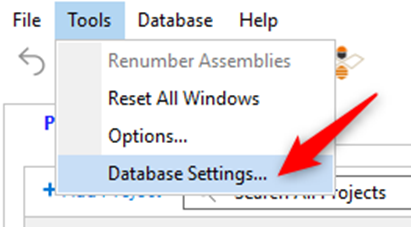
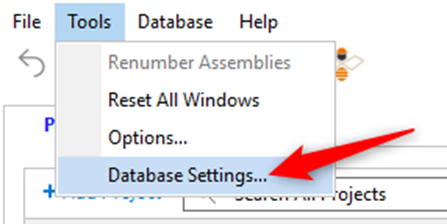
To connect to a set-up SQL Server as the admin, click Tools > Database Settings.
-
Add the SQL Server information in this window.
-
Click Apply and your database will be available on the SQL Server for others to connect to.
Server Hardware
| CPU | Between 8 and 16 Intel, AMD, or equivalent Processing Cores to efficiently manage multi-threading / hyper-threading processes. |
| RAM | 64 GB RAM is a minimum recommendation. However, 128 GB or higher RAM is an optimal configuration. |
| Storage | 1 TB SSD in a RAID 10 configuration. |
| Network | 1 Gbps (gigabit per second) is a minimum recommendation. However, 10 Gbps or higher is an optimal configuration. |
Multi-User Plan Storage
Many IT Administrators prefer to centralize their companies plan storage location where Estimators will navigate for accessing plans when creating a new BuzzBID Project.
The location can be a physical LAN storage location, or a virtual cloud storage location, such as Google Drive Streaming will mimic physical LAN storage with an average modest 10% degradation in transfer performance because Google Drive creates a cache of your most recent files to your local PC. This performance is nearly as fast as local storage.
Detailed Instructions
Note
If you already set up the Multi-User feature, you need to have a sequence for updating the connected PCs. Here are the steps.
- Update the Admin User first! This user has access rights to the SQL database. If other users attempt the update first - they can encounter errors.
- After the update is complete, update connected users.
Setting up the Admin User - SQL Server
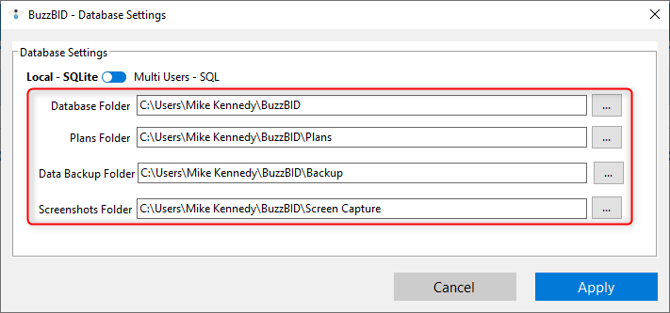
Once you have the SQL Server set up, you can connect your BuzzBID application to it. Click Tools > Database Settings to open a new window where you can input the information you need.
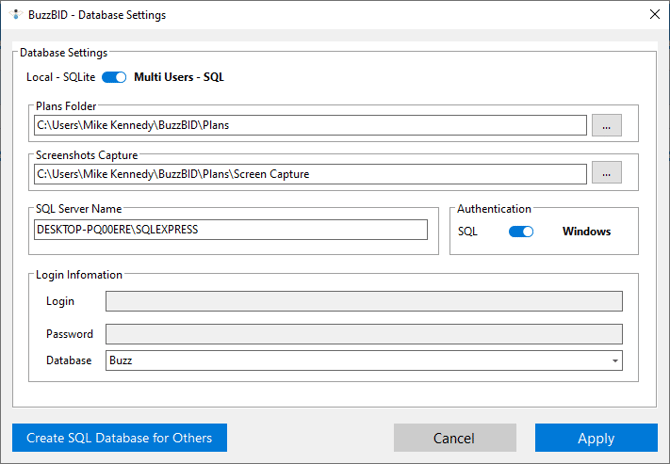
There are four sections you can modify within the Database Settings window.
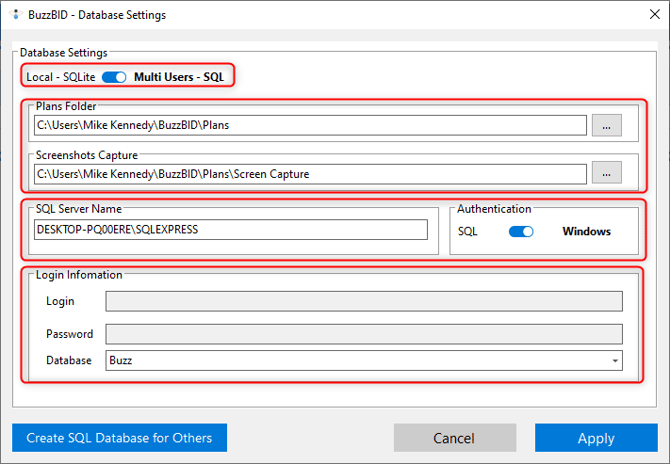
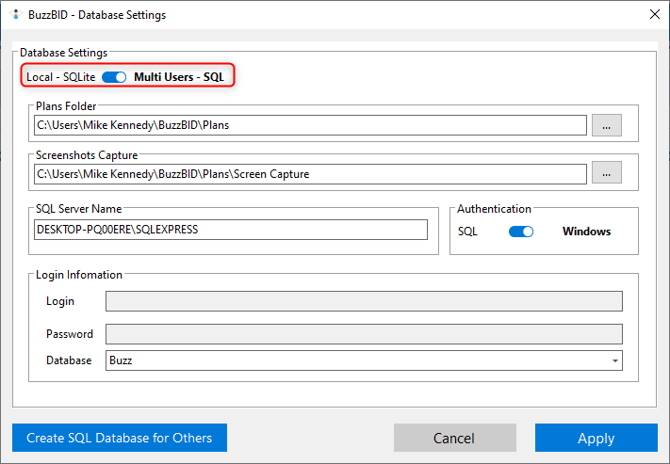
The SQLite/SQL toggle button allows you to choose what kind of Multi-User collaboration you want to implement in your workflow.
Quick Tip
With SQLite, up to 3 connections are available to connect to the Master (the PC which has the database stored) and share databases and you don’t have permission control.
With SQL Server, the number of connections is unlimited and you can set up permissions; it all depends on how they are set up by your IT department.
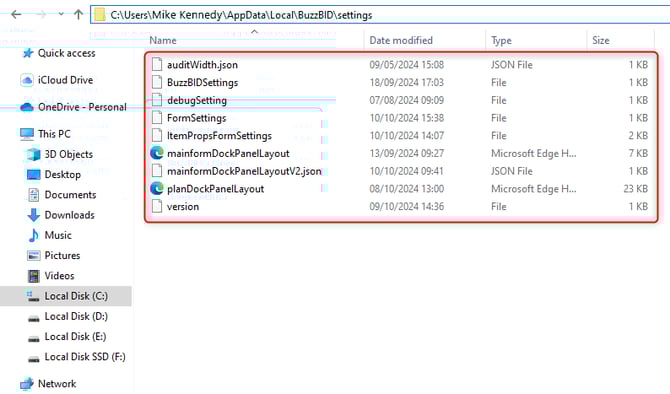
However, if you are running the Multi-User feature in a virtual machine environment, please note that the following settings need to be made permanent so that BuzzBID can retain database settings.
These settings are saved at the following location: C:\Users\[USER]\AppData\Local\BuzzBID\settings
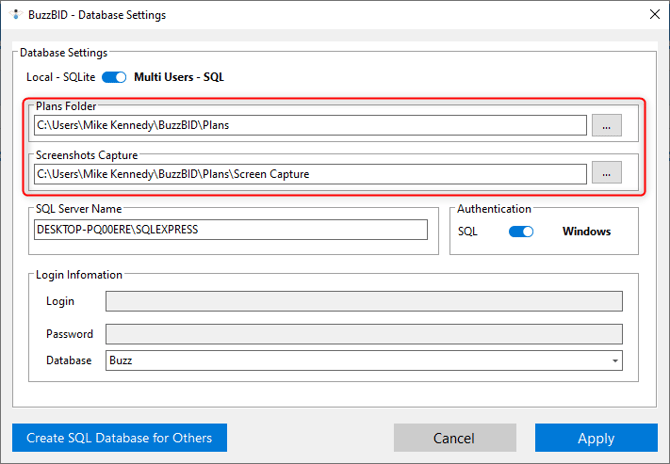
With the Plans Folder and Screenshots Capture cells, you set up where BuzzBID should store the screenshots and pull Plan Images from the Local Area Network (LAN).
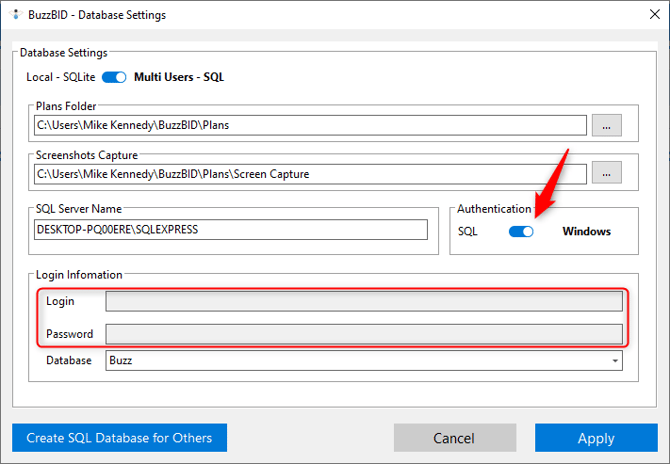
The SQL Server Name allows you to set up the connection to the SQL Server, while the Authentication toggle button lets you choose how you want to log in to the SQL Server.

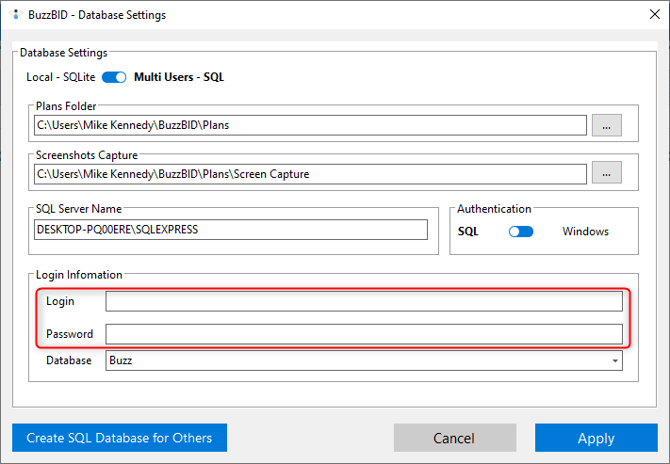
If you're using the SQL Server authentication, you need to input your database login information and password in the Login Information section, which will allow you to connect to the server and exchange data with other users on that server.
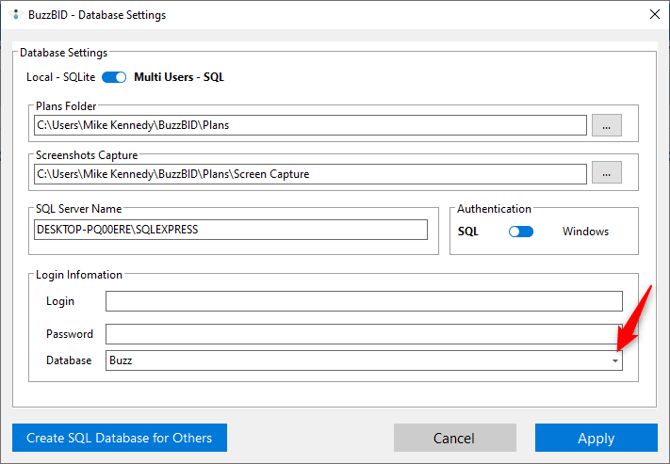
And finally, the Database section allows you to choose different databases, if your SQL Server has been set up that way.

Quick Tip
If you already connected to some databases on the SQL Server, you can choose between them from the dropdown menu by clicking on the arrow at the end of the Database cell.
Also, if the SQL Server has been set up to use Windows Authentication, the Login and Password cells will be inaccessible.
If you want to work on a new database, you can create it directly via the Database section. Just type a new database name > click Apply, and BuzzBID will check if the database you typed exists on the SQL Server. If it doesn’t, you will see a message asking you to confirm whether you want to create this new database.

Quick Tip
Creating a new database takes several minutes. Also, the permissions for creating files and databases on the server-side need to be properly set up so that the user can create databases.
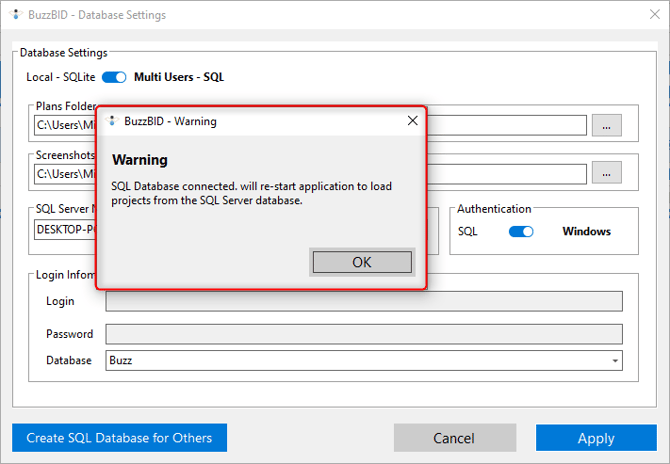
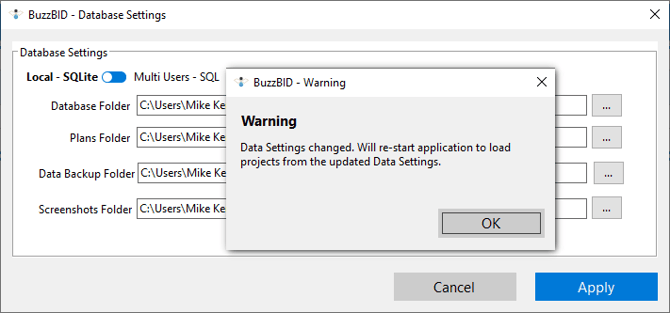
Once you connect to or create the database, you will receive a message stating that BuzzBID needs to restart in order to load everything. Click OK and wait for the app to restart.

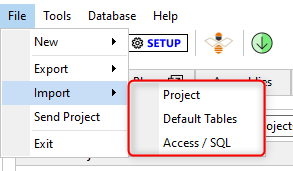
Now, your BuzzBID application can be used to communicate with the SQL Server. You can import Projects, Default Tables, and Access/SQL databases to your application, and they will synchronize via the SQL Server.
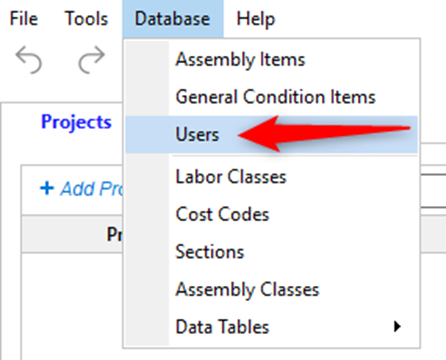
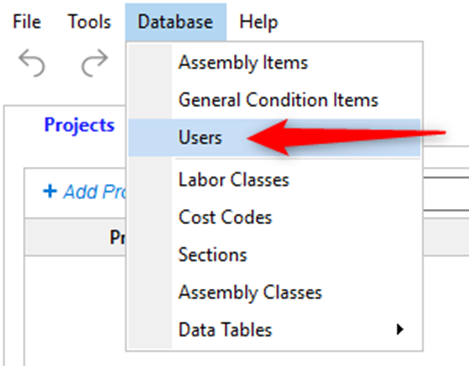
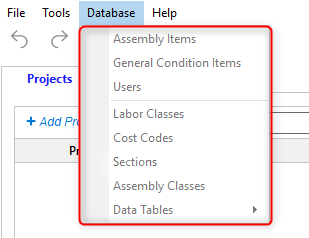
Also, if you go to Database > Users, you can see who has access to the SQL database, and if you are the Admin, you can change permissions as needed.
Quick Tip
By default, the person who created the SQL Server database is automatically the Admin.
Now, you can use the BuzzBID application as you need to, and the data will synchronize over the SQL Server.
Connecting Other Users to the SQL Server
To connect other users to the SQL Server, click Tools > Database Settings. Then, input all the information as the above. You should see a message saying that BuzzBID has connected to the SQL database and it needs to restart.
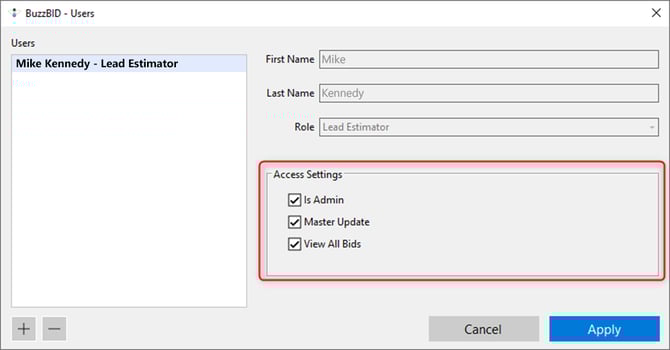
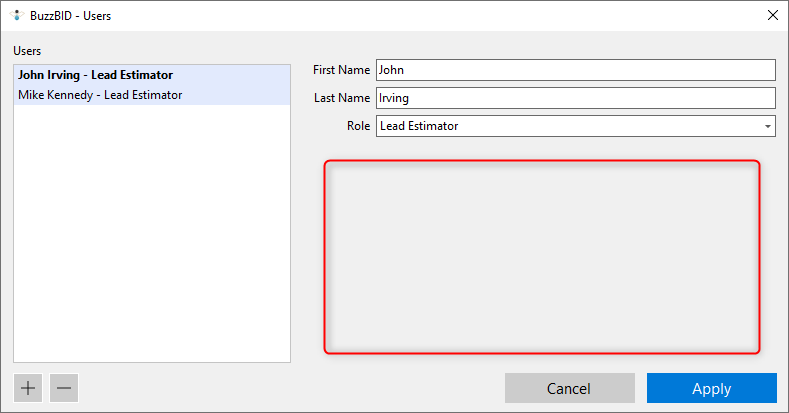
Once connected, the Admin user will see new users when they open Database > Users window.

Now, the Admin user can modify permissions given to all other users that have been added to that specific database.
Quick Tip
By default, users who connect to the Admin SQL Database aren’t allowed to view all Bids, update Master-level data, or be added as Admin. The Admin can change these permissions as needed via BuzzBID.
Also, if the Admin user imports a Master Table and the Table contains other Users, these imported Users will not have permission options since these are not separate Users who connect to the Database.
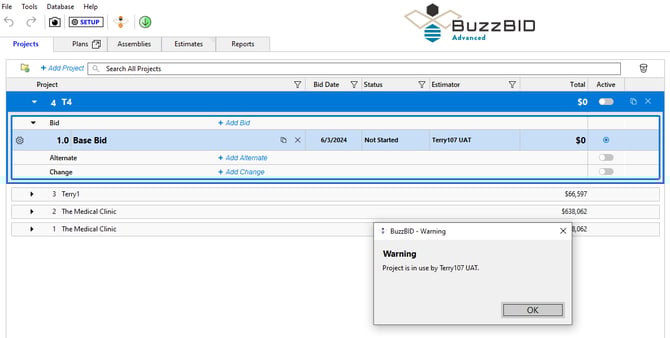
Also, regardless of the permissions, if one user is working on a Project via Plans, Assemblies, Estimates, and Reports tabs, no one else can access that Project. This refers to Base, Alternate, and Change Bids.
To refresh the Projects tab and see the Bids that have been added in the meantime, simply switch to any other tab and come back to the Projects tab, and you will see the latest Bids.
Quick Tip
BuzzBID doesn't create SQL Server accounts. That's why you can use the same SQL Server login credentials for every user, or use Windows Authentication. It depends on your environment or needs.
If you want to minimize the login permissions, two SQL Server logins are needed at least. You need an admin SQL login to update the database, so you should run the app with the admin user first.
You can also create normal user SQL login details for read/write data after the database schema is updated or created.
SQLite functionality
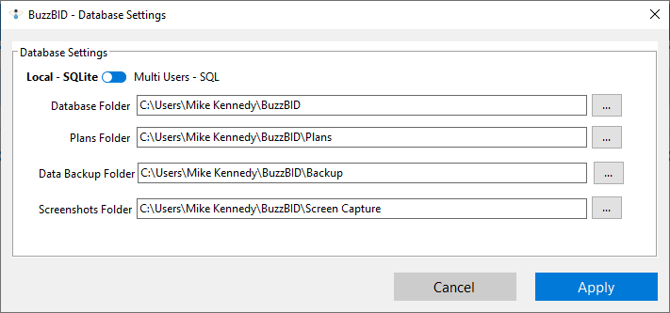
The SQLite functionality allows you to collaborate on the data, and doesn’t require you to set up a server, only shared folders on your PC. Its intended use is to share data, not actively collaborate on a Bid. It works as a Master → Node relation, and you can’t set up permissions, only allow access to your database.
To set up SQLite, you first need to either have a shared folder in your LAN (Local Area Network) which will hold your data, or make the installation folder on your hard drive shareable. The BuzzBID data folder’s standard path is usually C:\Users\[Your username]\BuzzBID, so you can set up sharing options by right-clicking the folder.
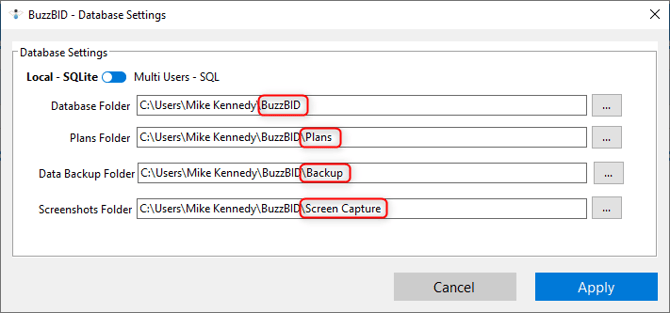
Once the Master user does either of the above two options, the user that wants to connect to the Master computer needs to open Tools > Database Settings and click on the three dots at the end of each cell to find the exact folders.
Note
You need to select the exact folders that have the necessary data. Otherwise, the database setup may not work.
Once you set up everything, click Apply and the application will restart.
Now, the connecting user is connected to the shared database.
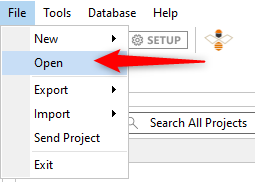
To only access a shared SQLite database, click File > Open, and a new window will appear.

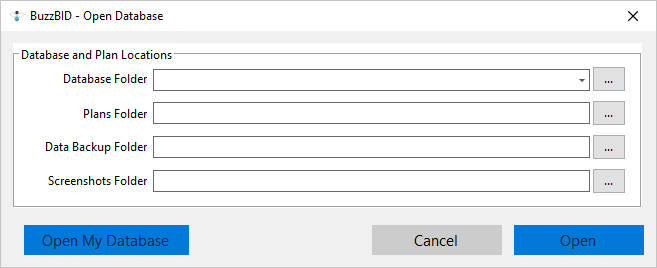
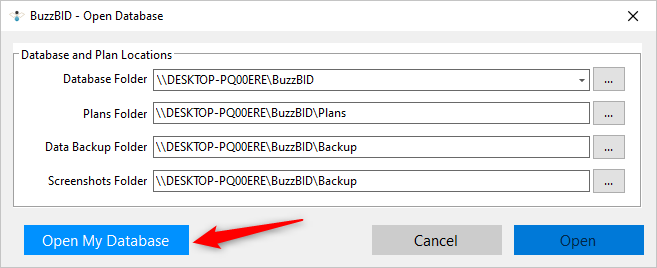
Input shared folder information in this window, and BuzzBID will automatically populate the other cells if the folder has all subfolders. Then, click Open.
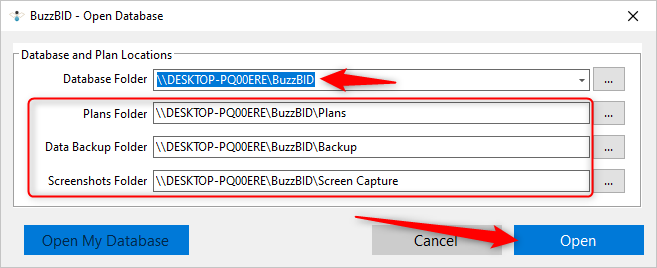
A red notice will appear, indicating that the Node user is using a different database.

The connected user cannot access anything in the Database menu to modify the shared database.
To go back to your database, click File > Open > Open My Database.